Translate

Tuesday, March 26, 2013

Easy Vegetable Medley

Happy Tuesday!

While I've been cooking almost daily for a while, I don't really count things like canned soup or ham and salami sandwiches, although I will for sure be making things of this nature in college. I'm now on vacation, which generally means a lot of eating out at whatever restaurant we can find...night one included +Applebees, which I was happy to discover now has a grilled chicken with mushrooms and mixed vegetables!

Last night, while shopping for food with my dad, I decided I wanted a veggie medley that I could make in about as much time as the pasta I was making for my brother. Rather than buying a head of cauliflower, a head of broccoli, raw carrots, and raw green beans and sweet peas, my dad suggested that I choose from the massive mixes of frozen vegetables that were already cut, steamed, and ready to roast. This sounded very college-practical, so I decided it was worth doing.

The Recipe: Easy Vegetable Medley


  • One package of frozen cauliflower, broccoli, and carrot chunk medley
  • 1/2 package of frozen green beans, yellow green beans, sweet peas, and baby carrot medley
  • 1/3 package of frozen green peas
  • About three teaspoons of extra virgin olive oil
  • Salt
  • Pepper
The Process: 
  • Break apart frozen ingredients while they're in the bag and allow them to sit and thaw briefly
  • Set the broiler on your oven to high
  • Put the grate on a high shelf, depending on the depth of your pan, so the vegetables can be close to the flame
  • Pour your ingredients into a bowl and mix 
  • Pour the mix into a baking pan
  • Drizzle olive oil over the vegetables in the baking pan
  • Sprinkle salt and pepper to taste over the vegetables in the baking pan
  • Use a spatula to mix the vegetables  around so they all become coated in the oil-salt-pepper mix
  • Put the pan in the oven for 10-15 minutes, watching closely because all ovens differ 
  • They are done when the broccoli and green beans develop brown edges, and the carrots appear to have a skin 
  • Take out the vegetables and enjoy!
The Calories: 
The mix made about 4 cups of vegetables, which is 473 calories! I was full after about 2.5 cups. Health gets a score of 10/10. 

What went right:  
               The vegetables came out wonderfully. They are simple and filling with high fiber; very nutritious. 

What went wrong: 
               Nothing really...this is a relatively fool-proof method of making vegetables. I might leave them in for another minute or so to make them softer, but that is the difference between using freshly steamed and frozen vegetables I suppose. 

What I would try next time: 
               Other than cooking a little bit longer, I would like to try adding some teriyaki sauce or maybe some sesame seeds for a totally different taste. I would also like to try a honey glaze, or adding garlic or onion to the mix. 

Would I do this in college: 
               Oh yes. I will be doing this many, many times in college! I love the not having to steam or deal with whole heads of cauliflower and broccoli. 

Overall a very successful dinner!! 

Sunday, March 10, 2013

Deceptively Healthy Snack 1: German Chocolate Fudge Balls

This is the second Deceptively Healthy Snack (counting the Cheese Its), but this is far more healthy than that and exceptionally more deceptive.

The Recipe: German Chocolate Fudge Balls 
  • 1/2 cup Pitted Dates
  • 1/2 cup Pecans
  • 2 tbsp Coconut Shreds
  • 2 tbsp Cocoa Powder
  • 1/2 tsp Vanilla Extract


                                                          The Process:
  • Using a magic bullet, slowly mash the dates, de-clogging it when it stops mixing 
  • Next, add the coconut shreds and mix again
  • Cut the pecan slices into smaller pieces before adding and mixing
  • Add the vanilla extract and cocoa powder and mix
  • Cover a pan with wax paper
  • Make the batter into small truffles 
  • Roll in cocoa powder, if desired
  • Refrigerate/freeze until balls harden
  • Try to stop eating ;) 
The Calories:
1/2 cup of dates has 110 calories, the coconut shreds have 71 calories, the pecans have 373 calories, the cocoa powder has 25 calories, and the vanilla extract has 6 calories. The recipe makes about 18 truffles, so each one has 32.5 calories. This may sound like a lot, but a Lindt truffle for instance has 90 calories, and none of the health benefits of pecans or dates. 

Health Benefits of Pecans and Dates: 
The balls turned out great and didn't take too long to do in the magic bullet. I love that they're no-bake and very healthy. They definitely don't taste like dates at all! (Good and bad...I coaxed my brother into trying them and he liked...shhh ;) ) 

What Went Wrong:
Originally, I made one batch and realized that I hadn't mashed the dates enough and possibly made them in the wrong order for ideal truffle form, by adding the pecans last. I also hadn't chopped the pecans before adding them, which is very necessary for keeping the mixture together. The second batch is much smoother, although they both taste fantastic, and forms balls more easily.

I will for sure be making this in college!!!!


Challenge 2: Veggie Pasta Salad

Hello Hello!

So last night I made myself some dinner and ended up with a lovely pasta salad that I'm sure I'll be making all the time...super easy and incredibly delicious :)

The Recipe:  Veggie Pasta Salad

  • One large Red Pepper
  • One Yellow Squash
  • One cup of small White Mushrooms 
  • 1.5 cups of Tri-Color Penne Pasta
  • Olive Oil
  • Garlic Salt
  • Lemon Pepper
  • Classic Pepper
  • Salt
  • Shredded Mozzarella
The Process:  
  • Wash and dry all vegetables
  • Set the broiler on Low 
  • Cut the ends off the squash. Cut it in half the long way, and cut each half in small slices. 
  • Put the squash in a baking pan with olive oil, garlic salt, lemon pepper, and classic pepper
  • Shake the pan slightly so all the squash gets marinated
  • Put in the oven to be broiled for about 15 minutes, shaking the pan every few minutes
  • Cut the top off the pepper and remove the seeds
  • Slice the pepper into strips
  • Put the pepper in a baking pan with olive oil, salt, and pepper 
  • Put in the oven to be broiled for about 15 minutes, shaking the pan every few minutes
  • Cut each mushroom in half
  • Put the mushrooms in a baking pan with olive oil, salt, and pepper
  • Put in the oven until the mushrooms brown 
  • Boil some water in a small pot
  • Pour desired amount of pasta into the pot
  • Cook to taste, which for me means slightly softer than al dente
  • Strain the pasta
  • Mix the pasta and all the vegetables in a bowl
  • Serve with or without mozzarella sprinkled on top

The Calories:
The squash had 14 calories, the mushrooms had 44 calories, the pepper had 14 calories, and the pasta had 300 calories. The total dish, which filled about four large bowls, was 362 calories, 400 with cheese. So one bowl was about 100 calories. 

What Went Right:
All the vegetables were delicious, the pasta came  out great, it was really healthy and pretty quick! Only about 30 minutes to prepare because I put all the veggies in at once. 

What Went Wrong:
I put a bit much garlic salt on the squash, so some of the pieces were more salty than I liked, but once all the ingredients were mixed together it wasn't a big deal. I would still use less next time. 

Other Ideas: 
I would have liked to add zucchini as well, perhaps. I feel like that would be a nice addition, and potentially some tomatoes. I'm sure I'll experiment with other veggies as well. 
If I wanted to make it a main dish, I would add some sausage slices to it. 

This is going to be a favorite of mine in college :) It stores pretty well too, and it's nice and filling. 

Saturday, March 9, 2013

Cooking Marathon 1: Sweet Potato Pie, Loaded Banana Bread with Cream Cheese, Twice Baked Cauliflower, Zucchini Pizza, and All Natural Cheese-Its!

Happy Saturday!

Sorry it took forever to get this up...I stayed home from everything on Tuesday because we had a snowstorm, so finally posting what I did instead :) believe it or not I had planned to make two other no bake dishes as well...decided to slow my roll on that one as I already took this long to post about these five and I will be cooking again tonight.

Without further ado, in the order of creation:

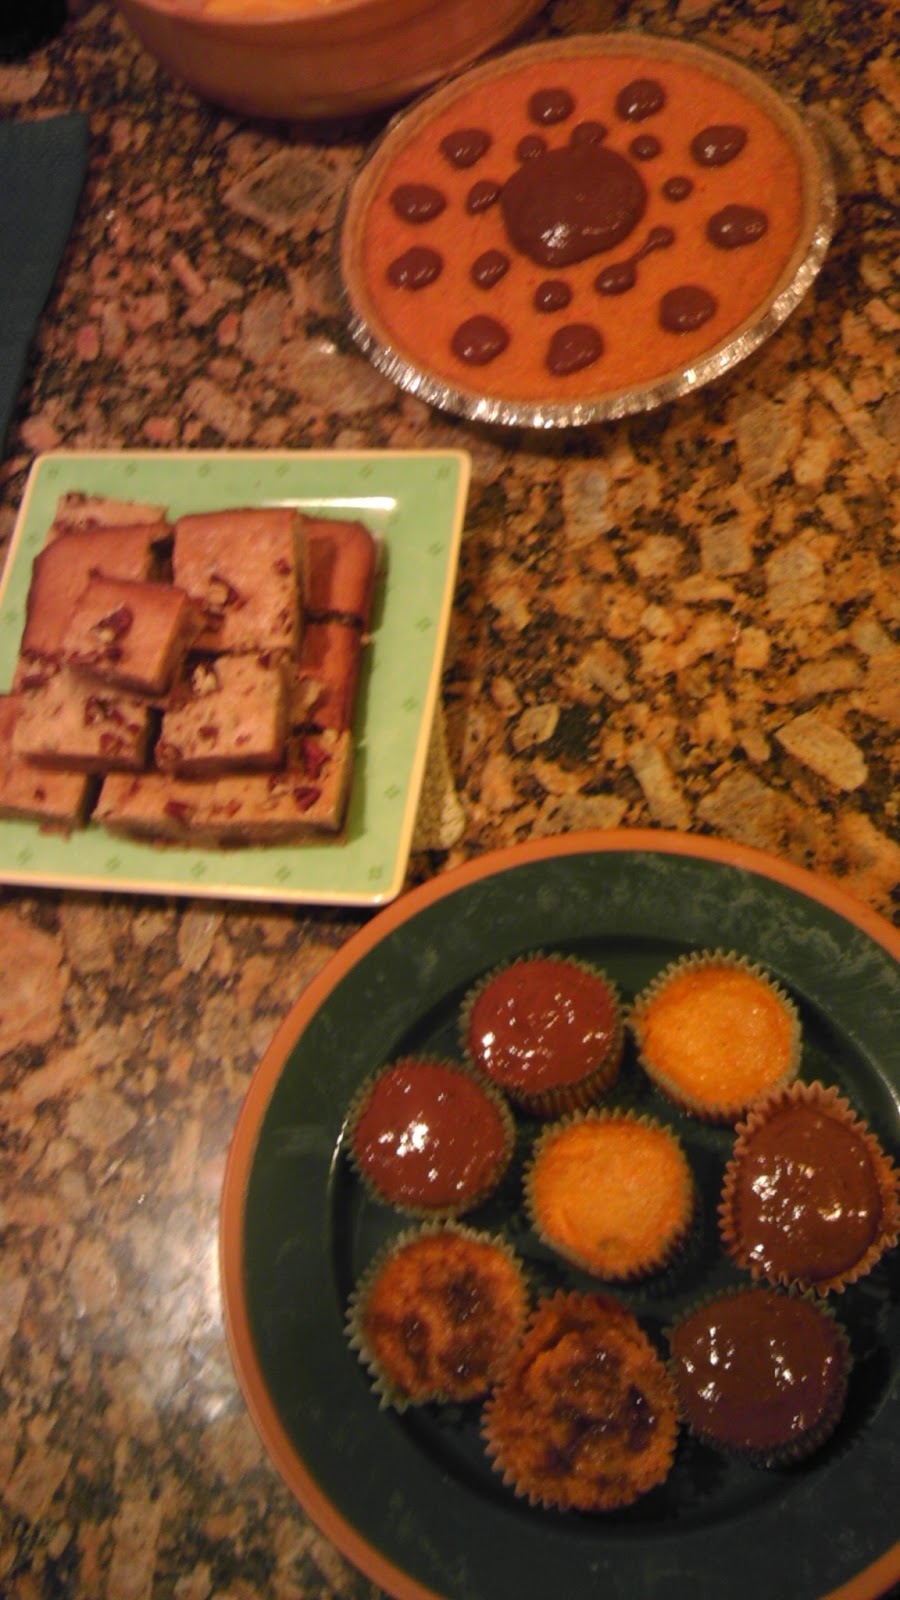
The Recipe: Sweet Potato Pie (with Banana Chocolate Frosting)

  • 1 large sweet potato (about one pound)
  • 1 cup of butter
  • 1 cup of white sugar
  • 1/2 cup of milk
  • 2 eggs
  • 1/2 tsp of nutmeg
  • 1/2 tsp of cinnamon
  • 9 inch all natural graham cracker crust
The Process: 
  • Boil the sweet potato so that it becomes soft (I didn't do this long enough, so I'll be putting my extensive process in parentheses)
  • Remove the skin of the sweet potato and mash (or in my case, remove the skin, slice and dice the potato, and use the magic bullet to mash it as best as possible) 
  • Soften the butter in the microwave
  • Mix the other ingredients in a bowl 
  • Add the mashed sweet potato
  • Mix once again
  • Pour mix into the crust
  • Pre-heat the oven to 350 degrees
  • Bake for about half an hour, testing the center of the pie as needed
  • (Pour the excess batter into cupcake paper and add chocolate chips to taste)
  • (If desired, add brown sugar to the tops of the cupcakes as they finish baking)
  • (Put in the fridge until dinner)
  • (Frost as desired)
The Calories: 
The sweet potato had a total of 390 calories, the butter had 810 calories, the sugar had 720, milk had 130, the eggs had 144, the nutmeg had 6, the cinnamon had 6, and the crust had 880...for the entire pie batter, that means 3086 calories, but divided into about 8 slices, that's 385.75 calories per 1/8 pie. Granted, I also made 9 cupcakes, so it's probably less than that per slice. It's not exceptionally healthy, but at least it's not a cheese pie or a chocolate pie xD
What went right:
                 As previously mentioned, the sweet potatoes were not boiled long enough, but they turned out totally fine...less mashed than they should have been possibly but the pie turned out very nice and even better after being refrigerated. We are only just getting to the end of it....sweet potato pie is very heavy! The chocolate and the brown sugar in the cupcakes went over very well. 

What went wrong: 
               Freaking sweet potatoes. Oh well...live and learn! At least the recipe won't take two hours from start to finish next time. 

The Icing: Banana Chocolate Icing...deceptively healthy :) 
  • Freeze a banana
  • Remove its skin
  • Mix with 2 tbsp of cocoa powder
  • (Add a splash of milk because I was very impatient)
 
The Calories: The banana has about 90 calories, depending on size, the cocoa powder has 24 calories, and the milk had about 130 calories. In total, that's 244, but I only used about a third of the recipe or so. And it's mostly banana. 
The icing turned out well! I cut the bottom tip off a sandwich bag to apply it. 

Moving right along!! 


Because of the sweet potato snafu, I decided to put the cauliflower in early. So I put the baked apples in the oven and my sweet potato pie mess in the dish washer, and then broke the cauliflower off the head. This proved wonderfully difficult! I resolved on using a knife to cut a chunk out and breaking it from there...quite a mess but it worked and hopefully I'll do it better next time :) 

While waiting on the dishwasher I did everything I could to prep the cauliflower dish...cut my peppers and measured the other ingredients out. I still had quite a bit of time, so I started on the Cheese Its...the recipe seemed simple enough...

The Recipe: All Natural Cheese Its 
  • 1 cup shredded cheddar cheese
  • 1/2 stick of unsalted butter, softened
  • 1 cup of flour
The Process: 
  • Pre-Heat the oven to 350
  • Using a blender, mix the ingredients until they become relatively solid. There will be chunks but it should all easily come together as one batter 
  • Every 30 seconds or so, stop the blender and de-clog it so it will continue to blend
  • Once the batter seems relatively together, remove all of it and make one large ball
  • Take the batter ball and put it on a piece of wax paper about a yard long
  • Place another yard of wax paper on top of the ball
  • Using a rolling pin, roll the ball into a pan shape as best as possible. It should be quite thin. (Realize that the dish washer has finally finished!)
  • Cut the batter into squares using a small sharp knife (decide halfway through that this can wait, and made the banana and cauliflower dishes first)
  • Coat a baking pan with wax paper 
  • Use a spatula to take each square off the wax and place it about 1/4 an inch away from all other squares on the pan
  • Take the edges of the batter that are not shaped properly and repeat the balling and cutting process until the batter is done 
  • Bake for about 10 minutes (to desired brownness) and then remove and flip each cracker using the spatula...they will be hot!!
  • Bake on the other side to desired brownness
  • Remove and cool for about 5 minutes
  • Enjoy!
The Calories:
The cheese has 455 calories, the flour has 450, and the butter has 404 calories. The whole batch of crackers is 1309 calories, which makes about 30-40 crackers in one inch squares. Estimating it makes 40 crackers, each cracker is about 4.4 calories. This is only a calorie or so less than normal Cheez Its, but then again, it's only made with three ingredients, and using low fat cheese and wheat flour would make it even more healthy.

What Went Right: 
             They were absolutely delicious and reallyyy addicting. They have a sort of pita-esque taste and I can see them being great with dip. My family loved them and requested another batch...so that happened today. 

What Went Wrong:
            The process took a while, so I decided to soften part of the cheese and fully melt the butter when I made the second batch today...helped soooo much! 

Would I make them in college? Yeah probably. I'll have to try them on the magic bullet before I decide that. I could probably hand mix too and I'll have to try that as well. 

In between this recipe came my Loaded Banana Bread again...but this time I doubled the batch I did last time -as requested- and put it in a more shallow, but larger, baking pan. The banana bread was half as thick, which I didn't quite like as much for it, but it was still very very good.
 
 
Finally, my cauliflower was ready!

The Recipe: Twice Baked Cauliflower
  • Mini red, yellow, and orange peppers
  • One head of cauliflower
  • 4 ounces of low fat cream cheese
  • 4 ounces of low fat sour cream
  • Half a cup of mozzarella and cheddar shredded cheese
The Process: 
  • Boil and mash the cauliflower
  • Slice and dice the peppers
  • Mix all ingredients together and put into a casserole dish
  • Bake at 350 for about 10 minutes
  • Sprinkle cheese on top and bake until the cheese starts to bubble slightly
The Calories: 
The cauliflower had 210 calories, the cream cheese had 262 calories, the sour cream had 154 calories, the cheese had about 160 calories. The total recipe had 786 calories. Very, very healthy :)
 What Went Right: The cheese was great, having the peppers was great, the dish tasted good enough...
What Went Wrong: 
          Possibly mashed the cauliflower too much, because it was very very mashed, leaving the dish lacking in texture, except for the peppers. We decided the dish needed green onion and bacon, and possibly some cheese baked inside...so that might happen later on!
                                                                        

Would I make this in college? eh....maybe. It's not exceptionally difficult and I do like it even without the proposed additions.


My final recipe of the day had to be made while eaten...so I made the sauce and prepared the zucchini slices before dinner. 

The Recipe:  Zucchini Pizza 
  • Three zucchinis
  • Pizza sauce
  • Butter and garlic salt melted together
  • One package of mozzarella
The Process: 
  • Heat the panini pan on the stove
  • Heat the pizza sauce (tomato sauce with basil, garlic salt, lemon pepper, salt, pepper, italian spices)
  • Melt about one tbsp of butter and a few sprinkles of garlic salt in the microwave
  • Cut the ends off the zucchini and slice it into long strips
  • Brush the garlic butter onto both sides of the zucchini strips 
  • Put as many strips as fit onto the panini pan and cook until they sizzle
  • Use a spoon to put pizza sauce on the zucchini strips
  • Sprinkle mozzarella on the zucchini strips
  • Serve warm!
The Calories:
The zucchinis had about 20 calories each, and were cut into 6 strips, the sauce has 20 calories total, and I used maybe half a teaspoon per strip, and a teaspoon of mozzarella per strip, which has about 12 calories. Each Zucchini pizza slice came to less than 20 calories. The most healthy thing I've ever made. 

What Went Right: 
            Sauce was yummy and the thicker slices were really good. 

What Went Wrong:
            I cut the slices too thin for the most part, I should only do four per zucchini. The zucchinis should really be grilled to get the most out of them. Panini pan is the next best thing. But grilled is ideal. 

I plan on making this in college for sure! I enjoyed them quite a bit :) 

Overall it was a fantastic day of cooking and eating, and hopefully my next tries with these recipes will be even better! I learned a lot on Tuesday :)  
 

Sunday, March 3, 2013

Dessert 1: Loaded Cream Cheese Banana Nut Bread

When you have browning bananas sitting in a bowl, what's the first thing that comes to mind?
Thanks to +Sugar&SpicebyCeleste for the Pinterest that made me think of Banana Bread! 

I decided to take my own twist on the classic, which meant an additional, FAR more healthy recipe...so let's start with that and I'll update after dinner when we try the banana bread :) 

The ingredient: Baked Cinnamon Apple

The recipe: 
  • One apple, peeled
  • 1/8 tbsp butter
  • 1 tsp cinnamon
The process: 
  • Put the butter and cinnamon in a small, microwave-safe container
  • Pre-heat the oven to 350 degrees. 
  • Microwave for about 20 seconds
  • Stir the butter and cinnamon
  • Using a knife, spread the cinnamon butter on the entire apple
  • Put the apple on a baking pan
  • Bake at 350 degrees for about eleven minutes (bake time will depend on the apple you use...keep a small knife nearby to test the apple and make sure the knife tip goes in easily) 
  • Keep the apple covered as it cools for about 10 minutes. You should be able to hold the apple easily without burning yourself, but it should still be warm. 
  • When you slice/bite into the apple (it is advised that you eat it with a fork, as it will be messy), there should be streaks of cinnamon). 
  • Enjoy! 
What went right: 
Honestly, everything! In order to make the banana bread, I cut the apple into small slices/chunks. I ate the portion that was left around the core and really it was so delicious. This thing tastes like candy, I could eat a whole pie of it....hint hint wink wink nudge nudge ;) 

What went wrong:
I only made one....

Calories and nutrition:
The apple on its own is about 75 calories, and with the butter (12 calories) and cinnamon (6 calories), the total is only 98 calories for a delicious and healthy treat! 

From start to finish, the apple took maybe 20 minutes. Barely enough time for me to get the rest of my ingredients started. I will definitely be making it frequently in college. It's very satisfying as well. 

The Recipe:  Loaded Cream Cheese Banana Nut Bread
  • One baked Cinnamon Apple
  • 4 oz (1/2 a small tub) of soft, low fat Cream Cheese
  • 3/8 cup of unsalted Butter (Love how a stick of butter comes with markings on the wax paper!) 
  • Two overripe Bananas, mashed in a separate bowl (by my wonderful little brother <3) 
  • One cup of Sugar
  • One large egg
  • 1 1/2 cup of flower
  • 1/4 tsp Baking Powder
  • 1/4 tsp Baking Soda (which I learned today is totally different from baking powder! xP)
  • 1/2 tsp Vanilla Extract
  • 1/4 tsp Salt
  • 1/4 cup of Pecans
  • Desired amount (For me, about 1/4 cup) of 60% Cocoa chocolate chips 
The process: 
  • Keep the oven at 350 degrees
  • Soften the butter in the microwave
  • Using a hand mixer, beat the butter and cream cheese at a moderate speed until creamy
  • Gradually add sugar (about 1/3 cup each time should do) and beat into the mixture, using a spatula to keep all ingredients in the center of the bowl
  • Gradually add flour and beat into the mixture
  • Add baking soda, baking powder, vanilla extract, and salt, and the egg and blend 
  • Add mashed banana and blend 
  • Cut the cinnamon apple into desired sizes
  • Blend the cinnamon apple into the batter
  • Add chocolate chips and blend into the batter
  • Butter desired baking pan...I used a square pan of about 6x6 inches with a 3 inch depth. A cupcake pan would work too, or anything really. 
  • Pour the batter into desired baking pan and smooth with spatula
  • Bake on the top shelf away from heat source for 22 minutes
  • At 15 minute mark, put the sliced pecans in their own pan and roast for 2 minutes
  • Allow the pecans to cool
  • After 22 minutes of baking the banana bread, scatter the roasted pecans on top
  • Bake banana bread for another 30-45 minutes, testing it every 13-15 minutes
  • When it is done, allow it to cool with a paper towel over the top of the pan
  • Enjoy! 
What went right:
The banana bread is super nice and moist, the pecans turned out fantastically on top, the density is really nice...it's light but it still has a richness. The apples and chocolate and cinnamon, when they're prevalent, really add to the flavor. Addicting!!

What went wrong:
I definitely needed more chocolate, or potentially cocoa shavings instead of chips to make it more even, and potentially more apple. The cinnamon apple wasn't easy to taste in every bite, but I could see it in the bread and it definitely added to the texture in a beneficial way. Next time I'll mix more thoroughly and cut larger pieces.

Calories and Nutrition:
The difficulty of counting calories for this is that there are so many different ingredients. For the most part, it is just banana bread made with cream cheese. One slice of homemade banana bread with cream cheese is about 43 calories, adding 1/12 of a cinnamon apple (8 calories), two pecans at most (2 calories), and two chocolate chips at most (10 calories)...so one slice of my banana bread was about 63 calories. Using cream cheese makes it far more healthy than margarine. While it is about 40% fat, it also has two kinds of fruit, 2.5g of fiber, and is a great alternative to desserts like cake, cookies, ice cream, or donuts.

Very fun time baking this and now that I know the recipe well, I think I can cut the prep time in half next time. The one downside for most college students is not having a hand mixer...this is one of those recipes that would take a very large amount of diligent stirring without it and luckily I will have one when I get there, but I wouldn't try it otherwise. I think this will be a favorite healthy cake, but not something I make every day. I think this recipe would be better for cupcakes, or in a shorter pan, to get more area out of the same batter. The original was doubled, but when you have more you eat more xD

Thanks for reading! Hope you enjoyed :) 

Challenge 1: Cauliflower chips with broiled peas and carrots

Hey hey!

So for my first challenge, I decided to go all out with vegetables.

The Recipe: Cauliflower Chips
  • one cup of shredded cauliflower
  • half a cup of shredded mozzarella
  • one large egg
  • one tablespoon of olive oil
  • garlic salt
  • pepper
  • dried bruschetta seasoning  (personal choice, but unnecessary. Any seasoning or none would do) 
The Process: 
  • Heat the cauliflower in the microwave in a porcelain bowl, but they could be done in any other microwave-safe container.
  • Mix all of the ingredients together in a large bowl.
  • Oil a baking pan.
  • At 400 degrees, I baked the cauliflower until the edges are brown and I saw bubbles.


The Recipe: Broiled and Seasoned Peas and Carrots

The process:

  • The carrots were steamed in the microwave using the magic bullet large cup and steamer top. They took two minutes on high power, with about two tablespoons of water in the cup. 
  • Put the carrots into a pan and roll in olive oil, salt, pepper, and the same bruschetta seasoning. With the broiler on low, the carrots take about fifteen minutes. I made one cup of baby carrots.
  • I prepared half a cup of peas in the same manner as the carrots, without the bruschetta seasoning. These took about eight minutes.


What went right:
The peas and carrots were really good, had a nice skin on the outside and soft, flavorful centers :)

What went wrong:
The cauliflower, while brown on the edges, turned out more like an omelette than chips. It was still delicious, and I ended up putting three slices of salami and a few slices of avocado in the middle and folding it over. Still very healthy with protein and antioxidants.

What to do next time:
I think the cauliflower should have been heated longer, and I possibly should heat the cheese as well, so that the mix is less dense and more chip-like.
I also think it would be a good idea to switch baking pans and see if that makes any difference. I have seen it done with tin foil, so I'm considering trying that.

Calories and nutrition:
The cauliflower omelette had about 110 calories. I used reduced fat mozzarella, so it was mostly vegetable and protein.
The avocado had 78 calories, and is one of the most healthy, antioxidant-rich foods.
The salami had 99 calories for the three slices, the most fat, the most protein, but also was my main contribution of healthy lipids, which are great for the skin.
The carrots had about 110 calories as well, another vitamin and vegetable contribution.
Finally, the peas had about 70 calories, providing vitamins, veggies, and fiber.
Total meal: 467 calories, well balanced, and very filling!

Overall it was a great meal :) I was really happy with my first cauliflower endeavor, and I hope when I get the cauliflower chips right they will be as good as the cauliflower omelette!

Also, I'll take more photos next time and try to get some better lighting haha

Coming up: Banana-Apple Bread, Microwave Chips, Caramelized Strawberries, Bananas, and Peaches, No -Bake Granola Bars, and more!!