Translate

Wednesday, December 25, 2013

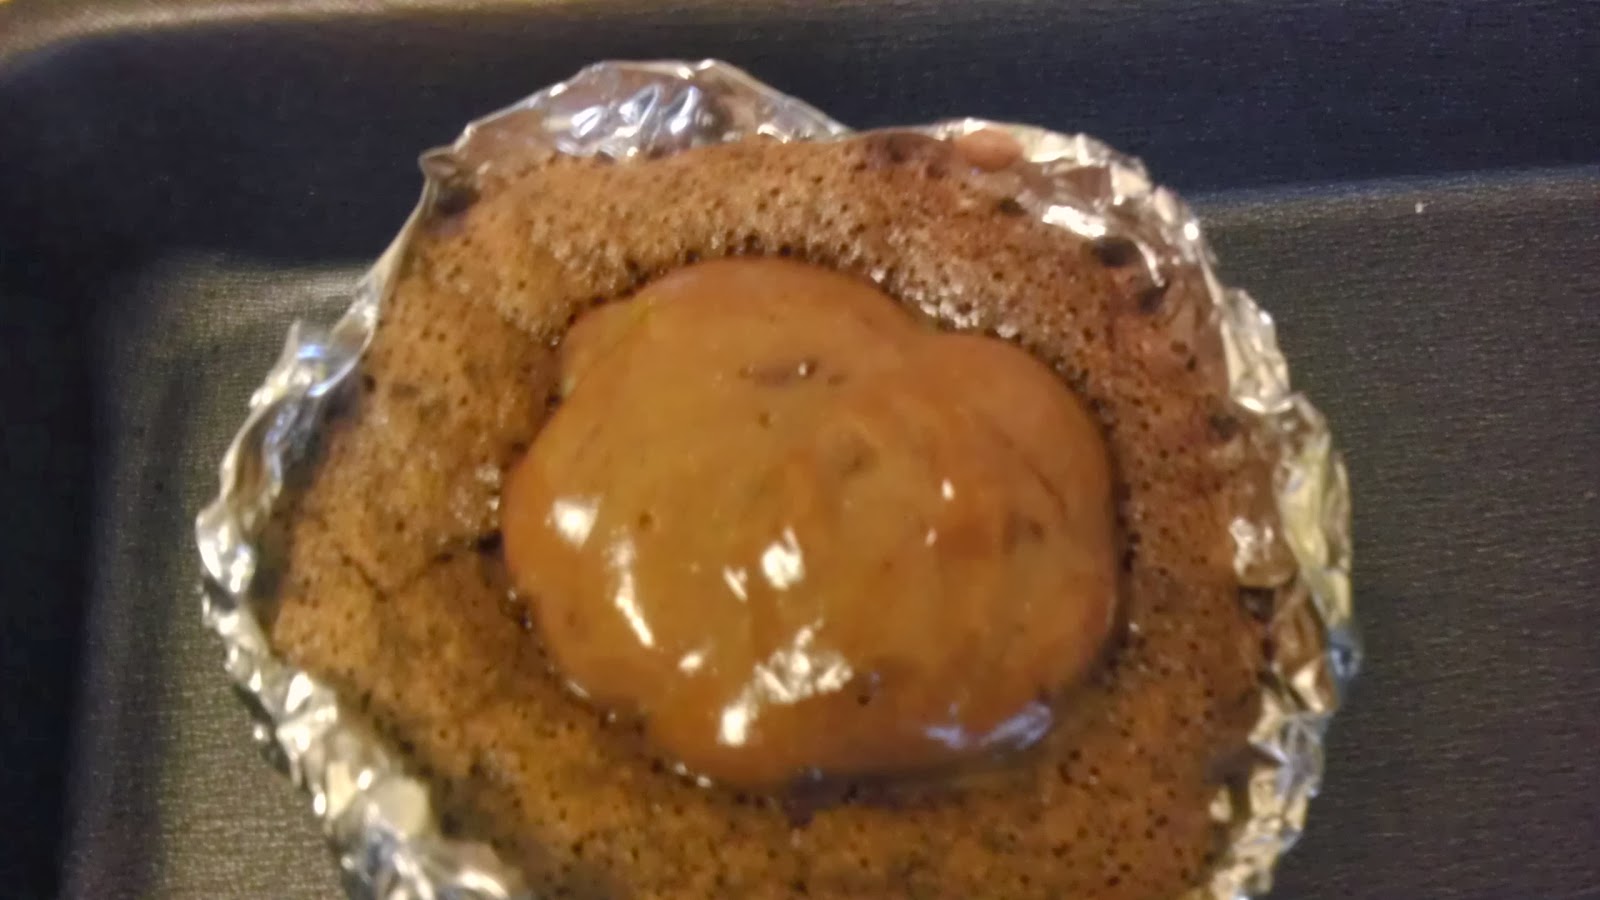
Fat Free Chocolate Custard Cupcakes

Hello and HAPPY HOLIDAYS!!

Today's recipe was inspired by a combination of having a random box of pudding to get rid of before break, having a cup of Karo syrup to get rid of before break, and one of my favorite recipes, Fat Free Chewy Chocolate Cookies. 

Thanks to Emmy for baking with me, and to Emma and Lauren for being our first tasters! 

The Recipe: 
  • 1 box vanilla pudding mix
  • 3 cups fat free milk
  • 1.5 cups flour
  • 1/2 cup sugar
  • 1/2 cup cocoa
  • 1 pack hot cocoa mix
  • 1/2 tsp baking soda
  • 1/4 tsp salt
  • 1/2 cup Karo Syrup
  • 3 egg whites
The Process: 
  1. Boil milk on the stove and mix with pudding. 
  2. Chill in the fridge for about 6 hours, or until it sets. 
  3. Preheat oven to 350 degrees F (176.7 degrees C). 
  4. Mix flour, sugar, cocoa, baking soda, and salt. 
  5. Add karo syrup and egg whites. 
  6. Bake in cupcake forms for about 8 minutes (depending on your oven). 
  7. Allow to cool. 
  8. Fill cookie press (with filling tip) with pudding and inject into cupcakes. 
  9. Once all cupcakes have been filled, mix cocoa with pudding and ice cupcakes. 
  10. Enjoy! 
The Calories:
Flour: 682 calories
Sugar: 387 calories
Cocoa: 98 calories
Baking Soda: 2 calories
Salt: 0 calories
Karo: 483 calories
Egg Whites: 36 calories
Pudding Mix: 90 calories
Hot Cocoa Mix: 30 calories
Milk: 259 calories
__________________________
TOTAL: 2067 calories

So it's not the most healthy, but it's much healthier than most other cupcakes, and fat free! The recipe makes 10 cupcakes, so each cupcake has 207 calories and is absolutely delicious. 

What went right: 
          If you're going to treat yourself to a cupcake, this is the cupcake to have! It's super delicious and satisfies the sweet tooth in the most lean way possible. 

What went wrong: 
           Nothing :) The only thing that could have worked better is the icing tip with the pudding. Pudding doesn't mold as easily as frosting, but is that really expected? 

Overall, an amazingly yummy, unbelievably healthy treat! 

The Workout: 
Still worried about eating that cupcake? 

Here's a quick and easy 200 calorie workout


Tuesday, December 24, 2013

Bacon Chocolate Chip Pancakes

Hello and welcome! 

This recipe is a simple classic cooked by look, feel, smell, and consistency. It's a different sort of cooking than I usually post, but it is relatively easy to do and very effective. It was inspired by my love for my little brother and made as breakfast for him when I returned home from school. This recipe is an easy way to make pancakes that much more special for the holidays, or simply an expression of care at any other time of year. 

Thanks Dad for teaching me to cook pancakes and meats with true knowledge of food, rather than merely by following a recipe. 

Thanks Kirby for being in the mood for bacon chocolate chip pancakes for breakfast so that I could cook this for you ;)

The Recipe: 
**Amounts depend on how much you want to make. The most important thing is to have an equal ratio of dry to wet ingredients, which you will know by the consistency.**
  • Favorite pancake mix (yes, I know, not from scratch, but my brother prefers buttermilk pancakes and cannot stand watching me put lemon in pancake batter). 
  • Milk
  • Egg (usually just 1, but if you're making a large batch you may need 2-3)
  • Canola Oil
  • 2 cups of equal sizes (we usually use the free plastic cups from restaurants/7 eleven)
  • Bacon (I used 1 strip for the whole recipe. You really only need a few small pieces per pancake)
  • Mini chocolate chips (I used less than a tsp per pancake)
  • Syrup (as desired)
The Process: 

  1. Set the broiler to high. 
  2. Broil bacon. It should sit on the outside of the pan, further from the flame so you can control how cooked it is. (My brother prefers his meat relatively rare, so this was very important! If you like your meat more well done and crispy, put it slightly closer to the flame.)
  3. Watch it closely after about 5 minutes. It should be time to flip it over. 
  4. Once the bacon is brown on the edges and at least slightly browning in the middle, remove broiler pan and allow to cool. You may want to wrap the bacon in a paper towel as it cools, to absorb excess fat and avoid having to turn the fan on. 
  5. Heat a small amount of oil in a pan on the stove (about 2 tbsp in my case). 
  6. In one of the two cups, fill about halfway with pancake mix (about 2/3 cup in my case).
  7. In the other cup, crack the egg. 
  8. In the cup with the egg, add a splash of oil (about 1.5 tbsp in my case).
  9. In the cup with the egg and oil, add milk until the wet ingredients look about equal to the dry ingredients (about 1/2 cup in my case). 
  10. Using a fork, whisk the wet ingredients. 
  11. Add dry cup to wet cup. 
  12. Whisk vigorously with a fork over the sink, making sure to reach all the way to the bottom (the consistency should be fluid, but thick enough to pour slowly. Think pudding. It is better to be thicker than thinner in this case. It's very easy to help a thick batter spread out, and you will end up with very decadent pancakes, but a very thin batter will be difficult to handle and will potentially splatter when poured.
  13. If your batter is too thick: add milk. 
  14. If your batter is too thin: add pancake mix.
  15. When the oil in the pan spreads to cover the whole of the pan, pour a small amount of batter onto the pan. 
  16. Cook the batter on low-medium heat so that it is easy to control. 
  17. When the pancake starts to bubble on the edges and potentially in the middle as well (see photo) it is ready to be flipped.                                      
  18. Before flipping, top with bacon bits and chocolate chips. Allow a few extra seconds on lower heat for the bacon and chocolate to set. 
  19. Flip the pancake and allow to cook to desired completion. (My brother prefers small amounts of batter in the middle of his pancake, so we usually accomplish this by making thick pancakes and cooking one side completely and the other side short.)
  20. Serve hot and repeat with remaining batter. 
  21. Enjoy! 
The Calories:
**Approximations based on my batter amounts**
Bacon: 50 calories
Chocolate: 99 calories
Pancake Mix: 64 calories
Milk: 61 calories
Egg: 78 calories
Canola Oil: 350 calories
_________________________
TOTAL: 702 calories

Not bad! Not great, sure, but not bad at all. This batter made 6 pancakes, making each pancake 117 calories. 

What went right: 
          The bacon was cooked perfectly, the pancakes came out wonderfully, and most importantly, my brother was happy :) 

What went wrong: 
           The batter consistency was a bit thicker than I prefer, but it made the pancakes perfect for my brother and easier for me to cook because there was a lot of wiggle room on timing. 

What I would do next time: 
           It would be fun to make bacon chocolate chips to use next time so I don't need to make bacon while trying to make pancake mix, but overall I think the recipe is great the way it is. Don't mess with what works!
           That said, this recipe would also make a great breakfast cupcake if poured into cupcake molds and baked, which would eliminate the extra frying oil.

Would I make this in college: 
           Potentially. It would involve keeping a large amount of bacon in the fridge for just one person. If I were cooking breakfast with friends or had the intention of making bacon-based meals for a couple days, I would be more likely to make this as well. It is certainly simple enough to do so. 

Overall, a delicious breakfast and enjoyable experiment! 

Monday, December 23, 2013

Bagel Panini Sandwiches

Hello and welcome! 

Today's meal was inspired by Chicago Bagel Authority, a restaurant by my high school that makes fantastic sandwiches on fantastic bagels that I've been craving for quite some time. 
                                     
Thanks Lauren, Emmy, Emma, and Keywan for having dinner with me and trusting my Improv Cooking :) 

Thanks Alec for the term Improv Cooking :) 

Thanks Aunt Connie for teaching me to make paninis :) 
                                   
Thanks dad for teaching me to maximize caramelization :) 
                                   
The Recipe: (Per serving)
  • 1 Bagel
  • 2 tsp Olive Oil
  • 2 tablespoons Shredded Cheddar Cheese
  • 1/4 cup spinach
  • 2 tsp Canola Oil
  • 1/4 cup mixed Cucumber, Mushrooms, Tomato Slices, Red Onion


The Process:
  1. Heat frying pan and panini pan on the stove. 
  2. Sautee cucumber, mushrooms, tomato, and red onion on frying pan. 
  3. Cut bagel in half using a serrated knife. 
  4. Use a glaze brush to coat both sides of both halves of the bagel lightly with olive oil. 
  5. Place the bottom half of bagel on the panini pan. 
  6. Sprinkle with cheese. 
  7. Add spinach. 
  8. Add sauteed vegetables. 
  9. Add top half of bagel. 
  10. Press until cooked (should take a minute or so depending on your stove). 
  11. Enjoy! 


The Calories:
Bagel: 260 calories
Cheese: 30 calories
Spinach: 3 calories
Olive Oil: 90 calories
Canola Oil: 80 calories
Vegetables: 10 calories
___________________________
TOTAL: 473 calories

What went right:
          Everyone loved these sandwiches and each only took about 5 minutes to make! Apparently they're also very good without cheese, because Keywan doesn't like cheese and loved it anyway. 


What went wrong: 
          I didn't make this sooner in the year :( 

What I would do next time: 
          Nothing, this is perfect the way it is and will be made so much more often from now on :) 

Overall, a super amazing, fast, easy addictive sandwich. Love. 
 

Sunday, December 22, 2013

Spritz Cookies with Friends

Hello and HAPPY HOLIDAYS!!

So apparently most people don't know what spritz cookies are, which shocked me because they are one of the most classic Christmas cookies ever.Hopefully the 200 or so spritz cookies Emmy, Lauren, Clarissa, and I made was enough of an explanation ;)
                                       
Thanks for baking and enjoying with me darlings <3 
                                        
Thanks to everyone who indulged with us as well :) 

The Recipe: 
  • 1.5 sticks butter (3/4 cup)
  • 1/2 cup sugar
  • 1 egg yolk
  • 1/2 tsp vanilla extract
  • 1/2 tsp almond extract
  • 1/4 tsp salt
  • 2 cups flour
  • Dark Chocolate (as desired)
  • Sprinkles (as desired)
  • Hershey Kisses (as desired)
  • Reeses (as desired)
  • Crushed Candy Cane (as desired)
  • Marshmallows (as desired)
  • M&Ms (as desired)
The Process:
  1. Preheat oven to 350 degrees F (176.7 degrees C). 
  2. To separate the egg, crack carefully and move yolk to one side of the shell. Transfer yolk between the shell halves, allowing the egg white to drip into another container. 
  3. Mix butter, sugar, yolk, vanilla extract, almond extract, salt, and flour. 
  4. Chill batter for about 30 minutes. 
  5. Fill cookie press. 
  6. Press dough onto baking pans using cookie press. 
  7. Decorate as desired. 
  8. Bake for 5-8 minutes, depending on your oven. 
  9. Allow to cool before removing from pan. 
  10. Share the love with friends :) 
The Calories:
Butter: 1215 calories
Sugar: 387 calories
Yolk: 55 calories
Vanilla: 6 calories
Almond: 6 calories
Salt: 0 calories
Flour: 910 calories
_______________________
TOTAL: 2579 calories

A single recipe makes about 65 cookies. This means each cookie contains about 40 calories. Not too shabby! 

What went right:
         Everything! These were such a hit, we made a double batch a couple days later :) 

What went wrong: 
         They're entirely too addictive. 
What I would do next time: 
          Try other toppings and potentially mix cocoa powder into part of the recipe to make chocolate spritz cookies. 

Overall, one of my favorite holiday traditions fulfilled! 

                                                                                                                                    
  Here are the Spritz Cookies with the Gluten Free Mint Chocolate Cookies:

Here is the final collection of my Christmas Cookies and Truffles, including Spritz Cookies, Gluten Free Mint Chocolate Cookies, Caramel Truffles, and Peanut Butter Truffles: 

Gluten Free Mint Chocolate Cookies

Hello and HAPPY HOLIDAYS!!

Welcome to yet another of my holiday baking experiments gone oh so right! 
                                  
Originally based in the Chewy Chocolate M&M Cookies, this recipe became something entirely new and unexpected, but still equally loved and appreciated by my gluten free friends :) 
The Recipe: 
  • 1 egg white
  • 1/3 cup cocoa powder
  • 1 cup powdered sugar
  • 1/4 tbsp vanilla
  • 1/4 cup melted chocolate
  • Crushed Candy Canes (as desired)
  • Water (as necessary)
The Process:
  1. Preheat oven to 350 degrees F (176.7 degrees C). 
  2. To separate egg, crack and turn such that the yolk falls into one half of the shell. Carefully transfer yolk between shell halves, allowing white to drip into a container below. 
  3. Melt chocolate in a microwave-safe container in 30 second bursts, stirring the chocolate after each burst. 
  4. Mix egg white, cocoa powder, powdered sugar, vanilla, melted chocolate. 
  5. Add water in small portions until the batter holds together and is moldable. 
  6. Roll batter into balls and "thumbprint". 
  7. Add candy cane pieces as desired 
  8. Bake for 6 minutes. 
  9. Enjoy and share! 
The Calories: 
Egg White: 17 calories
Cocoa Powder: 65 calories
Powdered Sugar: 389 calories
Vanilla Extract: 3 calories
Melted Chocolate: 80 calories
Candy Canes: 30 calories
______________________________
TOTAL: 584 calories

And that's for the ENTIRE recipe!! Each of the 25 cookies made has only 23 calories, and they're gluten free! 

What went right: 
          While I thought the consistency was totally wrong because it didn't match the consistency of the Chewy Chocolate M&M Cookies, they turned out amazing regardless. 

What went wrong: 
           Ditto :) 

What I would do next time: 
           It would be fun to try this recipe as a vegan recipe as well, by replacing the egg white with applesauce. Additionally, if dipped in unsweetened chocolate, this could make a delicious vegan truffle! 

Overall, a very successful recipe despite its deviation from the original. It worked quite well with my Spritz Cookies as well ;)        

Dinner for Four: Cheesy Rolls and Sauteed Vegetables on Penne

Hello avid reader!

Thanks for being here :) 

Today's meal was yet another event of Improv Cooking with my favorite lovely ladies of T3 :)     

 The First Recipe: Sauteed Vegetables on Penne (single serving)
  • 1 oz pasta
  • 1/4 tbsp butter
  • 1/2 tbsp cheese
  • 1/4 tbsp canola oil
  • 1/4 cup mixed Mushrooms, Peas, Cucumber, Zucchini, and Spinach


The First Process: 
  1. Boil enough water to fill 3/4 of a pot. 
  2. Cook pasta as desired. 7-8 minutes should produce al dente pasta. 
  3. In a small saucepot, combine and heat butter and cheese. Stir frequently. 
  4. In a pan, heat the oil. 
  5. Saute mixed vegetables in heated oil. 
  6. Strain pasta and mix with cheese. 
  7. Top with vegetables.
The Second Recipe: Cheesy Roll (single serving)
**Almost cheating, but we do what we can**
  • 1 wheat roll
  • 1 tsp cheese
  • 1/4 tbsp butter

The Second Process: 
  1. Preheat oven to 350 degrees F (176.7 degrees C).
  2. Cut roll open, but not all the way through. 
  3. Put half of the cheese and all of the butter inside. 
  4. Sprinkle the rest of the cheese on top. 
  5. Bake for 5 minutes. 
  6. Enjoy!

The Calories: 
Pasta: 100 calories
Cheese: 37 calories
Butter: 50 calories
Oil: 30 calories
Vegetables: 15 calories
Roll: 76 calories
________________________
TOTAL: 308 calories

What went right: 
         For a very satisfying meal, I'd say we did a great job with everything. The pasta and vegetables and rolls were perfect and worked quite well together. 

What went wrong: 
         The cheese sauce was a bit less creamy than I would have preferred, but it still tasted wonderful. 

What I would do next time: 
         Use a different cheese. 

Overall, a great meal and a lot of fun in the kitchen with my amazing friends :)  


No Bake Caramel Truffles

Hello and welcome! 

Today's recipe is almost too easy...
The Recipe: 
  • 1/2 cup caramel 
  • 1 bar dark chocolate
The Process:
  1. Spoon and shape caramel onto baking pan. 
  2. Melt chocolate in a microwave-safe container for 30 seconds. 
  3. Stir. 
  4. If not fully melted, repeats steps 2 and 3 until it is. 
  5. Cover caramel in chocolate. 
  6. Freeze to harden. 
  7. Share! 
The Calories:
Caramel: 150 calories
Chocolate: 210 calories
____________________
TOTAL: 360 calories

Okay, so it's not really healthy. But it is vegan and gluten free if you use unsweeetened chocolate, and for 20 servings, each one is only 18 calories. Worry not if you only eat a couple! 

What went right: 
          They tasted great and were good to have around for my Vegan and Gluten Free hallmates. 

What went wrong: 
           When they were not in the freezer, the caramel did not stay solid, but reverted to its stickier plasma form. Perhaps some cornstarch would fix that next time. 

What I would do next time: 
            Add cornstarch or heavy cream to help the caramel solidify when room-temperature. 

Overall, a super easy, tasty treat! 


Saturday, December 21, 2013

No Bake Peanut Butter Truffles

Hello and HAPPY HOLIDAYS!! 

Hopefully you've enjoyed the Dark Chocolate Peppermint Toffee recipe and shared it with others so they could enjoy it as well. (hint hint wink wink nudge nudge!) 
                              
Today's recipe was another of my holiday creations, but this one was somewhat of my own invention. 

Thanks to Emmy for making them with me, and to all my Turmanators for indulging :) 

The Recipe:  
  • 1 cup flour
  • 3/8 cup sugar
  • 1/4 cup peanut butter
  • 1 tsp vanilla extract
  • 1/2 stick butter
  • 1 bar Dark Chocolate
The Process: 
  1. Mix all ingredients except chocolate. 
  2. Melt chocolate in a microwave safe container in 30 second bursts, stirring after each burst. Should take at most 1 minute total. 
  3. Ball dough and dip in chocolate. 
  4. Freeze to harden. 
  5. Indulge and share! 
The Calories: 
Flour: 578 calories
Sugar: 93 calories
Peanut Butter: 379 calories
Vanilla Extract: 12 calories
Chocolate: 605 calories
Butter: 405 calories
_____________________________
TOTAL: 2072 calories

Okay, so that sounds bad. But this recipe makes 24 truffles, making each truffle only 86 calories. Much better! 
What went right: 
          These are freaking amazing and took almost no time. 

What went wrong: 
          So, they're not super healthy...oops! Workout to follow. 

What I would do next time: 
           Nothing! When making Christmas treats, calories are no matter.

Overall, an amazing recipe that I plan to make over and over again :) 
The Workout: 
Just to be safe, let's do a 100 calorie workout! 

Thanks to SparkPeople for this list of ways to burn 100 calories: 

  • Biking: 23 minutes of casual cycling
  • Cardio dance class: 15 minutes
  • Elliptical: 8 minutes
  • Jumping rope: 9 minutes at a moderate intensity
  • Lifting weights, vigorously: 15 minutes
  • Pilates: 24 minutes
  • Rowing machine: 13 minutes
  • Running stairs: 6 minutes
  • Running: 9 minutes of running at a 6 mph pace
  • Swimming: 15 minutes moderate intensity
  • Walking stairs: 11 minutes
  • Walking: 20 minutes of walking at a 3 mph pace
  • Water aerobics: 23 minutes
  • Yoga: 20 minutes
  • Zumba: 11 minutes

Easy Caprese Chicken

Hello and welcome to one of the few meat-centered meals on my blog! 

Today's recipe was inspired by pinterest, my distaste for steak and fish, and my friend Alec's request to cook dinner together at his place :) 

                                   
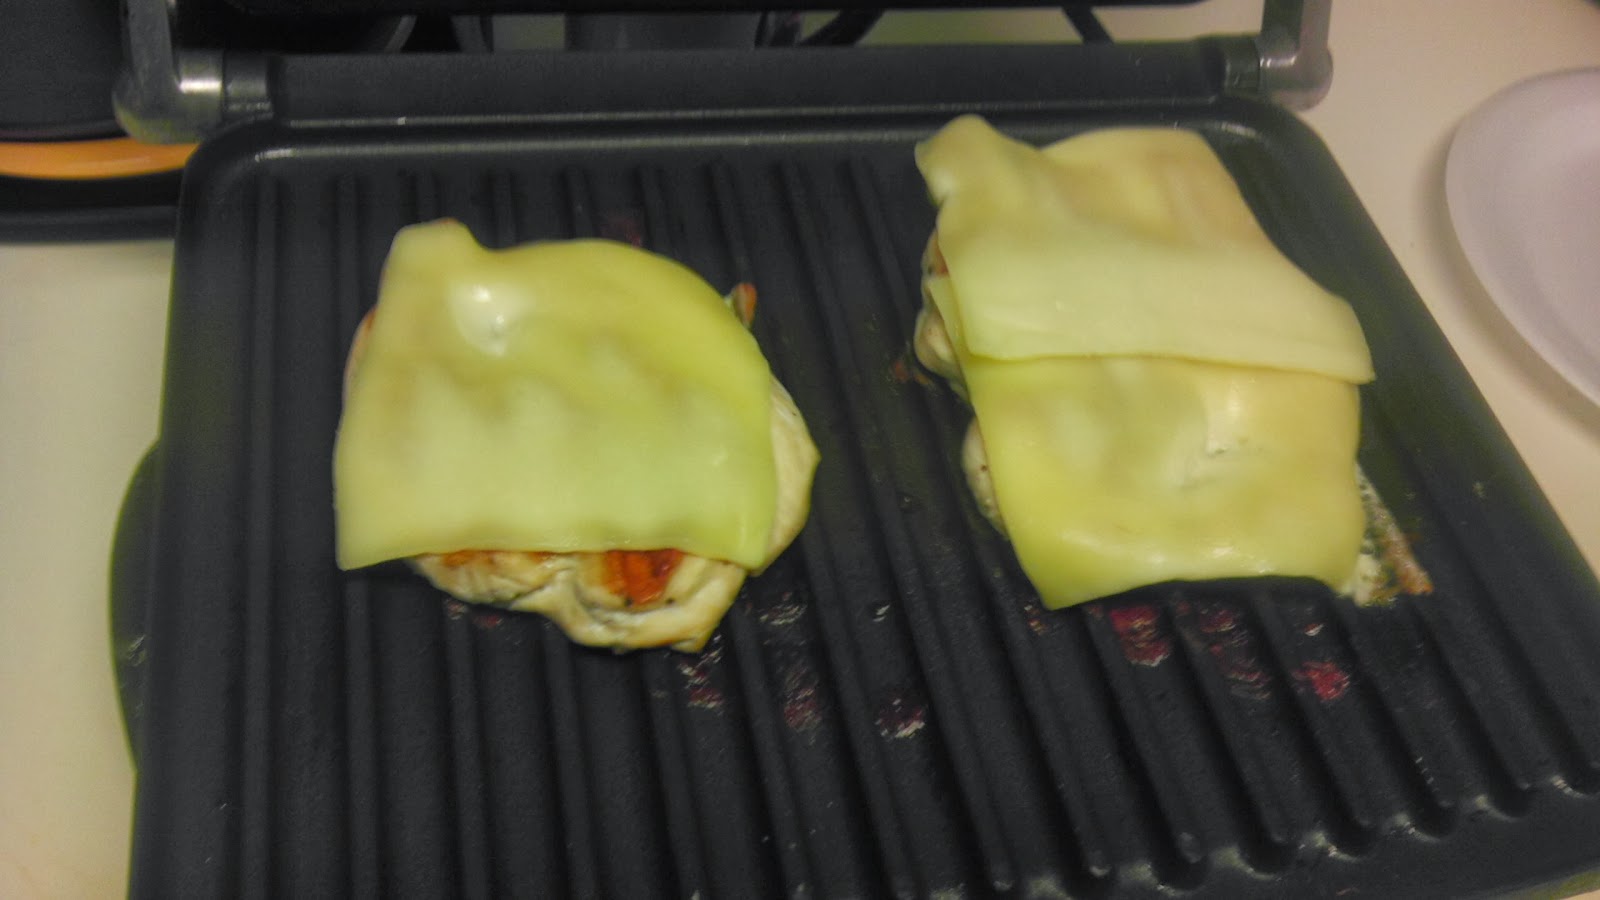
Alec insisted that we improvise, but as he once messed up ramen, I was a bit more into the recipe. That said, the original plan was to grill, but sadly Atlanta decided it was the right day to rain. We tried to start the coals, but it didn't work out too well. The state of the kitchen was rather expected from a house of men, but it was great that they had a panini press. Once we cleaned it, we set to work... 
The Recipe: Easy Caprese Chicken (Recipe per serving)
  • 1 Chicken Breast
  • 1-2 slices of Mozzarella Cheese 
  • 1-2 slices of Tomato
  • 1 tablespoon Balsamic Vinegar
  • 1 small slice Butter (about 1/2 tsp)
  • Sprinkle of shredded Basil 
  • Salt/Pepper
  • 1 tsp Olive Oil
The Process: 
  1. Heat the panini pan. 
  2. Wash the chicken breast. **Raw meats must be handled very carefully!! 
  3. Rub salt, pepper, and olive oil into the chicken breast. 
  4. Place chicken breast in panini press. 
  5. Wash hands! 
  6. Heat pan on the stove. 
  7. Make balsamic reduction in the pan by mixing butter and balsamic vinegar. 
  8. Wash and slice tomato. 
  9. Once chicken is nearly finished, place cheese on top and allow to melt. 
  10. Remove chicken from panini pan with a spatula and plate. 
  11. Place tomato slices on top, drizzle with balsamic reduction, and sprinkle with basil. 
  12. Enjoy! 
The Calories: 
Chicken: 250 calories
Cheese: 78 calories
Tomato: 5 calories
Butter: 10 calories
Balsamic: 26 calories
Basil/Salt/Pepper: Negligible
Olive Oil: 40 calories
__________________________________
TOTAL: 409 calories

What went right: 
         The dish worked well together as a whole and we had fun cooking together! 

What went wrong: 
         Personally, I thought the chicken was a little dry which meant we either over-pressed it slightly or needed to prep it more. It was still very good considering our college kitchen. 

What I would do next time: 
         Marinate the chicken and either bake it or plan to be able to grill it rather than panini pressing it. 

Overall, the dish was a success and a great evening of kitchen experimentation and catching up with an old friend :)