Translate

Showing posts with label health. Show all posts

Friday, May 23, 2014

Raw, Vegan "Sushi"

Welcome!

For the sake of clarity, I am neither vegan, nor vegetarian. That being said, this recipe looked too good to not try!
The Recipe:  Raw, Vegan "Sushi"
  • 1 cup Cashews (or just use some cashew butter)
  • 1 tbsp Rice Vinegar
  • 1 Zucchini
  • 1/4 Cucumber
  • 10 Baby Carrots
  • 3 small slices Celery
The Process:
  • Soak Cashews in water overnight (I soaked mine for a couple days because I didn't have time to make this for a while after)
  • Use Magic Bullet to mix the cashews and rice vinegar into a dip-like paste (it tastes pretty good on crackers too ;D
  • Clean the vegetables
  • Cut the ends off the Zucchini and cut it in half. Slice as many thin pieces as you would like to eat. Chop the rest into thinner pieces. (If you don't like Zucchini, you may accomplish this with cucumber)
  • Chop the carrots in half
  • Chop the cucumber into thin pieces as well (You may elect to only use the seeds of the cucumber, given their differing texture from the rest of the vegetables. 
  • Chop the celery into thin pieces as well
  • Spread the cashew dip onto the Zucchini strips
  • At one end, place a few of your thin strips of varied vegetables
  • Roll the end with the veggies into the rest of the Zucchini, forming a "Sushi" roll
  • Enjoy!
The Calories:

Cashews: 755 calories
Rice Vinegar: 25 calories
Zucchini: 31 calories
Cucumber: 45 calories
Carrots: 41 calories
Celery: Negative Calories 
______________________
TOTAL: 897 Calories

Before you freak out, the amount of the recipe that I used was about 1/6 the Cashews, 3/4 the zucchini, 1/2 the carrots, all the celery, and 1/4 the cucumber. So let's recalculate a little bit! 

Cashews: 126 calories
Rice Vinegar: 25 calories
Zucchini: 24 calories
Cucumber: 12 calories
Carrots: 21 calories
Celery: Negative Calories
_____________________
TOTAL: 208 calories

Now we get to divide by 13, since I made 13 rolls from what I did use. This makes each roll contain 16 calories. Doesn't that sound better to you?

What went right:
         They are super tasty, guilt free, and completely vegan. The only issue I have is with the cashew soaking, and even that isn't so big a deal...good things come to those who wait...especially since the cashew dip lasts for subsequent meals. 

What went wrong: 
         The cashew dip could use a little something so I'm probably going to be experimenting to see just what that is! 

What I would do next time:
         I might try some different nuts as the dip, or else add some spices to the cashews. I also might try adding some leaves to it, like kale or lettuce. I might also try making the dip with beans, chickpeas, or maybe even tofu. 

Will I do this in college?: 
         Oh yeah. This is a wonderful treat I hope to be making for a long time! Even beyond college, they would make fantastic appetizers.

Overall, I greatly enjoyed this recipe and look forward to making (and eating) it again!


Thursday, January 30, 2014

Lemon Chicken

Hello and welcome!

This recipe was adapted from Pinterest for Lemon Christmas...Thanks much Annie's Eats!

Lemon Christmas started with a story of Domathes passed down through the generations of my neighborhood, but became a five hour cooking spree with my Aunt Connie followed by dinner with my parents and brother, Aunt Connie, and Uncle Dick. In a single afternoon, we made Domathes, Lemon Chicken, Lemon Risotto, Lemon Broccoli, and Limoncello Cookies! It was a fantastic experience I will never forget and look forward to repeating every year with a different ingredient theme (hint hint ;) )

The only hiccup of Lemon Christmas was my wonderful little brother who absolutely will not stand for Lemon in his chicken....or so he thinks....in light of this, Lemon Chicken also contains the sister adaptation of Plain Baked Chicken for Kirby.


The Recipe: Lemon Chicken


  • 2 tbsp lemon zest
  • 1/3 cup lemon juice
  •  2 cloves garlic, crushed
  • 2 tsp thyme leaves
  • 1 tsp fresh rosemary leaves, minced
  • 1 tsp salt
  • 1 tsp black pepper
  • 6 chicken fillets
  • 2 tbsp butter, melted
The Process: 
  1. Combine the lemon zest, salt, pepper, lemon juice, garlic, thyme, and rosemary in a ziploc bag. 
  2. Add fillets to the bag. 
  3. Shake/rub to mix. 
  4. Refrigerate for 2 hours to marinate. 
  5. Preheat the oven to 425 degrees F (about 218 degrees C)
  6. Put chicken fillets in an oven-safe, preferably porcelain dish to cook. Include all marinade. 
  7. Brush fillets with melted butter. 
  8. Bake for 50-55 minutes, watching carefully in the last 10 minutes or so based on the typical tendencies of your oven. 
  9. Enjoy! 
The Picky Eater Process: 
  1. Combine 2 tbsp olive oil, salt, and pepper in a ziploc bag. 
  2. Add 1 chicken fillet to the bag. 
  3. Shake/mix. 
  4. Marinate for 2 hours. 
  5. In a separate dish, place the fillet and any remaining marinade. 
  6. Brush with melted butter. 
  7. Bake for 50-55 minutes at 425 degrees (at the same time as the other chicken. 
  8. Serve to your picky eater ;) 
The Calories: Lemon Chicken
Chicken (6 fillets): 684 calories
Lemon Zest: 3 calories
Lemon Juice: 20 calories
Rosemary: 2 calories
Thyme: 2 calories
Salt: 0 calories
Pepper: 0 calories
Butter: 204 calories
Garlic: 8 calories
___________________________
TOTAL: 923 calories

Remember, this was for 6 people. That means a single serving is only 154 calories! This might be the most healthy chicken recipe I've ever had for the taste. No replacements, all nutrients, all taste, and fewer calories than a cupcake. Wow. 

The Calories: Picky Eater Chicken
Chicken (1 fillet): 114 calories
Olive Oil: 119 calories
Salt: 0 Calories
Pepper: 0 Calories
___________________________
TOTAL: 233 calories

This assumes that all of the olive oil was actually eaten, but there was still marinade left in the dish when Kirby was done. Personally, I think the plain chicken has less flavor. All of the moisture and flavor in this version of the chicken came from the olive oil (aka fat), whereas a lot of the moisture and flavor in lemon chicken came from the lemon juice. 

What went right:
           We lucked into some MAGNIFICENT meats here. I mean, these chicken fillets were enormous and juicy, and the marinade complimented them perfectly. The herbs held enough flavor to equal that of the lemon, so the chicken was moist and thick, but not excessively lemony. The bake time was absolutely perfect. Some of our table was unable to finish even one fillet because they were that thick and meaty. Love! 

What went wrong: 
           This chicken was so good, I ate the table leftovers...oops ;) 

What I would do next time: 
            Absolutely nothing. This was utterly fantastic. Some other additions I might make in the absence of our Lemon Christmas sides are cherry tomatoes, some parmesan cheese, and some pasta shells or flat noodles. For a healthier adaptation, I might try baking it with some orzo and basil in the dish, or even wild rice (in honor of my dad's traditional Chicken and Wild Rice dish, one of my favorite meals of all time). 

Would I make this in college: 
             Possibly. It takes a while to marinate and if I were only cooking for me, I would end up buying a massive excess of herbs.

Overall, a wonderful main meat for Lemon Christmas, and a new favorite chicken of mine! 


Monday, October 21, 2013

Sauteed Vegetable Lettuce Wraps

Hello hello! 

This is another recipe from when I was back home. I have not done it in college yet, but only because I haven't been able to get my hands on full leaves of lettuce. 

This recipe is a take off of the Fridge Dump Lettuce Wraps. Originally, I was going to eat the veggies with a fork in a bowl, again considered a pita, and realized we still had lettuce! 

Without further ado...

The Recipe: Sauteed Vegetable Lettuce Wraps

  • 1 tsp butter
  • 3 medium carrots, chopped
  • 1 cup frozen green beans
  • 1 cup sliced white mushrooms
The Process: 
  • Warm a frying pan on the stove (5-10 minutes on high)
  • Once the pan is warm, add the butter and move the pan so that it spreads. Lower the heat to low-medium. 
  • Add broccoli and green beans to the pan. 
  • Add salt and pepper and mix with a spatula. 
  • Add carrots to the pan and mix with a spatula. 
  • Add mushrooms to the pan and mix with a spatula. 
  • Allow the mixture to cook, covered, for 5-7 minutes. You will be able to smell when the vegetables are done, and they will be slightly browned. 
  • Remove mixture and put in a bowl or on a plate. 
  • Spoon mixture into lettuce leaves. 
  • Wrap and enjoy! 
The calories: 


Carrots: 50 calories
Green Beans: 77 calories
Mushrooms: 68 calories
Butter: 25 calories
Salt/Pepper: insignificant calories
Lettuce: 6 calories
_______________________________
TOTAL: 176 calories

This entire recipe is very low calorie and very high satisfaction!

What went right:
          It was all delicious and super healthy!

What went wrong:
          Nothing really...although for the sake of balance, adding rice would have made it even better.

Would I do this again?: 
          Yes, definitely!

Overall this was a great take off of multiple food ideas and I look forward to having it with rice and maybe cabbage in the future!


Wednesday, May 22, 2013

Clean Eating Soft Pretzels

Hello Clean Eater!

Anyone else have a pretzel addiction? Yes? Great. Hi, I'm Sydney and I am a pretzel addict! Soft pretzels, pretzel sticks, pretzel thins, pretzel rolls, pretzel bread...say the word 'pretzel' and my brain automatically gets a burst of dopamine just thinking about the best pretzels I've ever eaten.

However, any soft pretzel is typically very rich and caloric, with lots of sodium. That's why this recipe made me very excited!


The Recipe:  Clean Eating Soft Pretzels
  • 4.5 cups of flour
  • 1 packet of rapid rise yeast
  • 3 tablespoons of honey
  • 1.5 cups of warm water
  • 1/2 teaspoon of salt
  • 2 tablespoons canola oil
  • 1 egg
The Process:
  • Preheat the oven to 350 degrees
  • Mix your honey into the warm water and stir
  • Pour the yeast in as well and allow to sit and foam
  • In a separate bowl, mix flour, salt, and oil (and egg if you, like me, don't assume ingredient lists will include what goes on top of the actual food)
  • Slowly mix in water/yeast/honey solution using a wooden spoon
  • The dough will get very sticky, and you will no longer be able to stir
  • Flour your hands and a clean, hard surface (preferably a granite table or any type of easy to clean, stable cutting board)

  • Knead the dough until it becomes smooth and workable. This may take a while! When the dough begins to stick to your hands, pick it up off the table and become one with the dough; it's much easier than trying to roll it around on the table.
  • Roll the dough out into long, thin tubes. They should be about 1.5 inches thick. 
  • Rip about one foot of dough off. Shape it into a U. Fold over each side to the center, making it into a pretzel shape. If you want pretzel bites, rip off small pieces and shape them into balls. 

  • Butter a baking pan and give the pretzels about an hour to rise before baking. 
  • Brush the tops of each pretzel with egg (which I did not do). 
  • Bake at 375 degrees until the pretzels brown slightly. This will take a different amount of time for the bites as the pretzels. Mine took about 20 minutes for the bites and 30 for the pretzels, but every oven is different. 
  • Allow the pretzels to cool before eating. 
  • Add desired topping (I added cinnamon sugar butter to half of them). 
  • When eating on a later date, pretzels should be put in the microwave for 30 seconds on half heat, bites for 15 seconds on half heat. 


Calories:
Because this recipe was taken directly (except for the placement of the egg in vs outside the batter) from another source, I know the pretzels have about 110 calories and the bites have about 30 calories. Typical soft pretzels contain about 400 calories. 

What went right: 
           The pretzels are delicious. They're firm on the outside and chewy on the inside like real German pretzels. They taste great with or without the cinnamon sugar. 

What went wrong:
            Clearly I put the egg in the batter when I should have brushed it on. I also didn't knead quite long enough, because the batter got better as I continued shaping the pretzels. 

What I would do next time: 
             I would like to try brushing the egg on instead of putting it in the batter because I do think it would make a difference. I would also like to try adding raisins or almonds. 

Will I do this in college:  
             May be after I get more used to kneading...it is a great arm workout...but it can get pretty messy and requires a lot of clean space to roll out the dough. Health wise, I will do it for sure!

Overall, it's a great recipe that I hope to adapt to breads and biscuits as I get better at it as well! 

Saturday, May 18, 2013

Egg Custard and Egg Custard Mini Tarts

Hey Dessert Lovers! 

Yes, I know this isn't particularly healthy. Which is why while it was cooling I went for a bike ride :) 

The Recipe: Egg Custard
  • 1 egg
  • 1 egg yolk
  • 1 cup whole milk
  • 1/6 cup sugar
  • 1 tsp vanilla extract
The Process: 
  • Preheat oven to 350 degrees 
  • Heat the milk on the stove until it simmers
  • In a separate bowl, mix the egg, yolk, sugar, and vanilla
  • Pour the mixture into the milk, whisking gently
  • Pour the new mixture through a strainer into a measuring cup
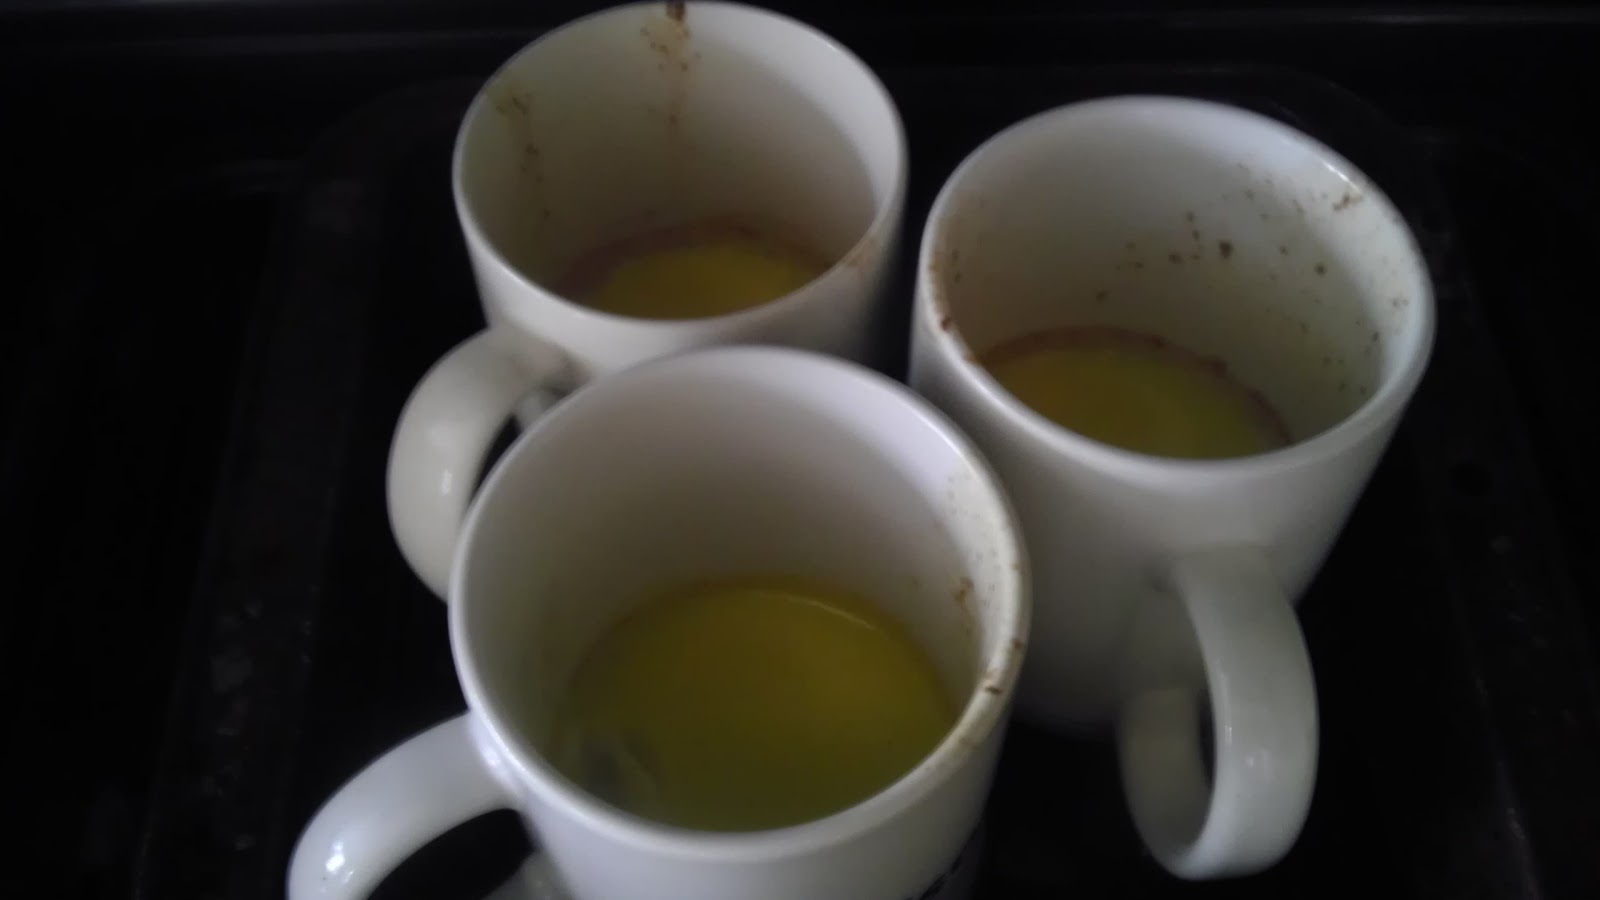
  • Place three coffee cups on a baking pan
  • Fill the pan with a small layer of warm water
  • Pour part of the strained mixture into each cup
  • Bake for 30-45 minutes, or until the custard has settled. You may have to test it, but the edges should be browned, and the custard should have a yellow skin. 
  • Allow to cool for 2 hours before serving. (I also put it in the fridge for another few hours.)
  • Enjoy!
Now, let's go through the Egg Custard Mini Tarts...
  • Press 1/6 of a crescent roll into each section of a mini cupcake pan
  • Pour a small amount of custard into each mini tart
  • Bake for 15-20 minutes
  • Allow to cool before serving (I also put these in the fridge)
  • Feel better about eating custard! 
The Calories:

Egg: 70 calories
Yolk: 55 calories
Milk: 146 calories
Sugar: 120 calories
Vanilla: 12 calories
_________________
TOTAL: 393 calories

One crescent is 90 calories, so each tart contained 15 calories of crescent. In total the crescents used about 1/6 of the custard, which is 66 calories. This makes each tart 26 calories! 

The rest of the custard was divided into each of the three coffee cups. This means each cup was 109 calories! 

What went right: 
          I made everything correctly...the tarts were pretty good, but...

What went wrong: 
          The Custard was a little egg-y...for obvious reasons...but it wasn't my, or my brother's thing. 

What would I do next time: 
          Make normal custard instead of egg custard. 

Will I do this in college: 
          Only if I meet people who love egg custard and I want to give them a birthday treat. 

Overall, I can't wait to make non-egg custard and see how that turns out! 


Thursday, May 16, 2013

Spring Easy Salad

Happy Spring!

Yet another late night fridge raid that led to a wonderful meal :) 

The Recipe: Spring Easy Salad
  • 1 apple, peeled, sliced, and diced
  • 3 inches of cucumber, sliced and cut in half
  • 1 tomato, sliced and diced
  • 5 leaves of Romaine lettuce, chopped
The Process:
  • Chop lettuce
  • Peel, slice, and dice apple
  • Slice and dice tomato
  • Slice cucumber
  • Toss salad
  • Enjoy!
The Calories;

Lettuce: 24 calories
Cucumber: 15 calories
Tomato: 33 calories
Apple: 77 calories
____________________

TOTAL: 149 calories

Of course, if you want to add any sort of dressing or oils that adds a lot of unnecessary fat and sodium. 

What went right:
          It's a great salad, light but filling. The great part about this salad is that it is light enough to have a large portion if you feel so inclined, but this size is definitely enough to satiate hunger. 

What went wrong:
          The tomatoes started to get a little warm since it took a while to eat the salad. Other than that, nothing. 

What I would do next time:
         I think it would be good to try it without the tomatoes, and instead add halved grapes and toasted nuts...possibly pecans, or honey roasted walnuts. 

Would I do this in college:
          Salads are definitely going to be a large part of my diet in college. 


Garlic Sesame Croutons

Hey Food Fans!

I know it seems strange that I'm making croutons, but I promise they were part of a fantastic salad! Plus, I got to use an old roll that we otherwise would have had to throw away.


The Recipe: Garlic Sesame Croutons

  • 1 sesame roll, cut into small cubes
  • 1/2 stick of butter
  • Pepper
  • Garlic Salt
The Process: 
  • Melt the butter onto a pan
  • Put the pepper and garlic salt into the melted butter
  • Cook the roll cubes in the pan, moving them around so they take in more of the solution
  • Cook until the solution has dissipated and the croutons have browned. 
  • Cool on a rack for about 10 minutes. 
  • Enjoy!

The Calories:

Sesame Roll: 220 calories
Butter: 405 calories
Salt and pepper: 10 calories
_________________________
TOTAL: 635 calories

Divided by 30, this means each crouton is about 21 calories. 

What went right: 
          They are very delicious and addictive. My family enjoyed eating them on their own before the salad was finished. I must say, they make a great snack. 

What went wrong:
          Nothing! So tasty, all natural croutons. 

What I would do next time: 
          It would be fun to try in a tomato soup or to make garlic bread. I would also like to try some different flavors, like making bacon in the same pan and then sprinkling them with cheese. 

Will I make this in college:
         Yes for sure. They're so delicious, only take a few minutes to make, and probably cheaper than buying croutons. They're also a great way to use stale bread. 

Overall, a delicious, useful little thing to know! 

Tuesday, May 14, 2013

Deceptively Healthy Dessert: Fat Free Chewy Chocolate Cookies

Welcome Deceptively Healthy Baking Fans! 

I was skeptical of this cookie recipe when I came across it on Pinterest. 'Fat free' and 'chocolate cookie' just didn't seem to fit in the same paragraph, much less recipe title. As the cookies came together, it made more sense...
The Recipe: Fat Free Chewy Chocolate Cookies
  • 1.5 Cups Flour
  • 1/2 Cup Sugar
  • 1/2 Cup unsweetened cocoa
  • 1/2 tsp Baking Soda
  • 1/4 tsp salt
  • 1/2 cup Karo syrup
  • 3 egg whites 

The Process:
  • Preheat the oven to 350 degrees
  • Butter a cookie sheet or spray with cooking spray
  • In a large bowl, mix/sift the cocoa, baking soda, flour, sugar, and salt. Try to get out all the lumps.
  • Crack your eggs into a smaller bowl, separating the whites from the yolks by carefully transferring the yolk back and forth between the egg shell halves. (You can save the yolks separately for later use in any other small container. If you do not save them separately, remember to label the container '3 egg yolks', so you know later on)
  • Add the egg whites and Karo (corn syrup) to the dry ingredients
  • Mix until the dough becomes thick, sticky, and thoroughly blended
  • Use a spoon to drop small cookie balls onto the cookie sheet (the recipe says it makes 30, but I made almost 60...size matters!)
  • Bake for 7-9 minutes, watching to see that the cookies rise
  • They will still be soft to the touch, but a toothpick test will come out dry
  • Allow cookies to cool and set for a couple minutes
  • When storing, be sure to use wax paper to separate the cookies, and do not lock them into the container. Otherwise, they will stick together. 
  • Enjoy!
The Calories:
Again, I've taken this recipe from another source. The only thing I changed was the salt content, which I cut in half. Additionally, mine were smaller. The recipe online says 55 calories per cookie. This makes mine about 27 calories per chewy chocolate cookie, and zero fat! 

What went right: 
         They are fantastic!!! Everyone who's had one loved it. They almost taste like brownies, and the small size, zero fat, and low calorie content makes them guilt-free as well :) 

What went wrong: 

         The first time I packaged them, I learned that they stick together. This was quickly remedied, and did nothing to the amazing taste of the cookies.

What I would do next time:
          A few new recipes for the batter come to mind...
  1. Fat Free Blondie Cookies (no cocoa powder and light Karo syrup)
  2. Fat Free Chewy Chocolate cookies with walnuts (add walnuts...could be done with pecans or almonds as well)
  3. Fat Free Chewy Chocolate cookies with white chocolate chips (add white chocolate chips)
  4. Fat Free Chewy Chocolate cupcakes with banana chocolate frosting (made with a frozen banana and unsweetened cocoa powder)
  5. Chewy Chocolate Boston Creme cupcakes (bake cupcakes, cut the top open, fill with custard, close, and top with all natural, home made whipped cream)
  6. Fat Free Chewy Chocolate cake batter (filling can vary from raspberries to chocolate truffle/mousse and caramel...possibilities are endless)
Will I do this in college:
          To all my lovely future classmates who so kindly read my blog, I promise you I will be making these cookies a LOT! They are quick and easy and -for the 15th time- fat free!

This recipe is definitely going to come back in other forms, so stay tuned for the fat free results! 


Wednesday, May 8, 2013

Loaded Oatmeal

Hello hello!

Thanks for being such an avid reader :)

While on my oatmeal kick, I decided to see what was so wrong about normal, instant oatmeal...

The Recipe:  Loaded Oatmeal
  • 1/2 cup Rolled Oats
  • 1 cup warm water
  • 5 strawberries, cut in 1/4 slices
  • 1 banana, sliced
  • 1 apple, sliced and diced
  • 1 tsp brown sugar
  • 1 tsp honey
  • 1/4 cup wheat germ

The Process: 
  • Preheat the oven for 325 degrees
  • Mix the water and oats
  • Microwave until oats are saturated
  • In an oven-safe bowl, mix the apple chunks, honey, and wheat germ into the oatmeal
  • Lay the bananas and strawberries on top of the oatmeal
  • Sprinkle the top with brown sugar, so that it will create a caramelized layer over the oatmeal
  • Bake the oatmeal for about 10 minutes, or until the brown sugar has all caramelized
  • Remove and transfer to a normal eating bowl 
  • Enjoy?
The Calories:

Rolled Oats: 150 calories
Strawberries: 15 calories
Banana:         105 calories
Apple:            77 calories
Brown Sugar: 17 calories
Honey:           21 calories
Wheat Germ: 104 calories
__________________________
TOTAL:        489 calories

Not terrible, considering this is high fiber and has three different fruits.


What went right: 
            The heated fruits were awesome!

What went wrong:
            I am not a fan of oatmeal.......the mushiness was definitely combated well through the fruit additions and they really don't taste like anything, so that's fine...

Would I do this in college:
           Can't say that I would! However, I could try a sort of baked fruit salad...hmmm...foreshadowing??

Overall, I did everything right and learned a valuable lesson about why oats are great in cookies and bread, but oatmeal...not so tasty! Oh well, I still ate it all :) 

Tuesday, May 7, 2013

Baked Pear Chips

Hey Fit Food Fans!

Ever seen a recipe that said "2 hours at 200 degrees"? Well I've seen many, and decided I don't have two hours to wait for the oven to make something!

The Recipe: Baked Pear Chips

  • 1 Pear
The Process:
  • Preheat the oven to 325 degrees
  • Thinly slice a pear and lay slices on baking sheet
  • Bake until brown
  • Oops?
The Calories:

1 Pear:   97

So yea, if it worked this would have been super healthy! The one pear made around 50 chips, and I did eat all of them.

What went right:
           I ended up with baked pear chips...sort of? 

What went wrong:
          Like I said, I ate all of them. But...not gonna lie, they were strange and kinda chewy but kinda mushy but kinda burnt...next time I'm not taking shortcuts!

Would I do this in college?:
           It'd be interesting to do in college...wait for my snack and race the oven to finish a paper or something along those lines. We'll see how the non-cheating batch comes out!

Overall, I've learned a valuable lesson about not cheating or taking shortcuts. Oh food...how you never cease to amaze me.

Sunday, April 21, 2013

Tomato Basil Mini Quiche-cakes

Breakfast. Introduced to most of us as "The Most Important Meal of the Day". Yet as we get older, most people end up skipping breakfast, giving the excuse: 'I don't have time'.

Not having time to eat is a common problem I've heard from most of my friends already on campus. Ironic, yes, because we also gain weight...but I think this stems from the larger metabolic lifestyle changes we don't need to get into right now (perhaps in a separate post!).

Regardless of age or schedule, we all have days when we wake up late or have to wake up early and lose out on that precious first meal. For those days, I thought about a way to solve the problem without resorting to expensive granola bars...

The Recipe: Tomato Basil Mini Quiche-Cakes
  • 2 large eggs (feel free to get whatever kind of egg you prefer, although I used white eggs)
  • 1/2 tomato, sliced and diced
  • 1 leaf basil, torn
  • A couple shreds of low-fat mozzarella, or other cheese, if desired. (I did some with and some without)


The Process:
  • Preheat your oven to 350 degrees
  • Place desired size cupcake paper in cupcake pan (any baking pan would work, but since I also made a small batch of cupcakes, it felt right to use the rest of the pan simultaneously)
  • Crack eggs into a bowl and whisk well with a fork
  • Slice and dice tomato and mix it into the eggs
  • Tear basil and mix it into the eggs and tomato
  • Fill each cupcake paper about 2/3 of the way full so your Quiche-cakes don't overflow (I had a bit much in two of mine...oops!) **Try to get a good portion of all three ingredients in each Quiche-cake. Otherwise it just isn't the same!**
  • Sprinkle desired cheese shreds on top.
  • Bake for about 15 minutes, checking for bubbles and a gelatinous/solid-looking texture (just in case your oven isn't the same as mine)
  • Allow to cool without covering for 10-15 minutes (longer if you make a larger size)
  • Carefully remove and refrigerate in tupperware
  • At this point, you may eat them warm, with a small fork or spoon, or you may keep them in the fridge. Personally, I like them as a cold finger food. If you are not going to eat immediately, you must refridgerate.
  • Don't skip breakfast for a few days :)
The Calories:
        This may vary slightly based on the kind of eggs you use, if you use cheese, etc. In my version:

Eggs: 147 calories
Tomato: 11 calories
Basil: 1/5 calorie
Mozzarella (1/4 tsp): 28 calories
_____________________________
Total: 186 calories

I made seven Quiche-cakes, so each held about 27 calories of mostly high-protein egg. Definitely high on the healthy scale!

What went right:
            The quiches that did not overflow were delicious and nutritious. The smaller portions make it easier to eat a few over 30-60 minutes and not feel the guilt or weight of a larger quiche or an omlette, while still providing necessary protein. They save well in the fridge and are still yummy three to four days later. I can't see them not being eaten before then.

What went wrong:
          Other than the overflow, I would like to try some different cupcake wrappings. The ones I used stuck to the Quiche-cakes and were harder to remove the first day. By the second and third they came off well but took a layer of food with them...which I, embracing my subconscious childhood cupcake reflex, ate off the paper. I'm going to try some different types with other ingredients and I will re-post when I find the right one :)

What I would do next time:
         Other than the paper and the overflow, I would like to try it in a larger size, just because, and with varied ingredients. I think it would be great with peppers, mushrooms, squash, zucchini, artichoke, and maybe even trying a kind of sweet-and-savory Quiche-cake with banana and chocolate chips.

Will I do this in college:
         Yeah I definitely think having premade mini breakfasts would be better than having to run to the dining hall in the morning, and cheaper/healthier than buying premade toaster treats or granola bars. Additionally, it saves fridge-space to make and keep them compared to buying and keeping the ingredients until I feel the urge to cook them. That initial laziness will be immediately forgotten when there's food at the ready...

...so maybe that's why breakfast is "The Most Important Meal of the Day"! Food is our fuel, and a good boost of protein and fruit/vegetable (I don't discriminate against your personal beliefs regarding the tohMAYtoe/tohMAHtoe) in the morning is a great way to wake up and feel invigorated for the day ahead. Why stay in bed when there's something yummy in the fridge across the room? Now that you're up and eating, wow...it's really nice out! let's leave a little early for class and enjoy the day :)


Sunday, March 10, 2013

Challenge 2: Veggie Pasta Salad

Hello Hello!

So last night I made myself some dinner and ended up with a lovely pasta salad that I'm sure I'll be making all the time...super easy and incredibly delicious :)

The Recipe:  Veggie Pasta Salad

  • One large Red Pepper
  • One Yellow Squash
  • One cup of small White Mushrooms 
  • 1.5 cups of Tri-Color Penne Pasta
  • Olive Oil
  • Garlic Salt
  • Lemon Pepper
  • Classic Pepper
  • Salt
  • Shredded Mozzarella
The Process:  
  • Wash and dry all vegetables
  • Set the broiler on Low 
  • Cut the ends off the squash. Cut it in half the long way, and cut each half in small slices. 
  • Put the squash in a baking pan with olive oil, garlic salt, lemon pepper, and classic pepper
  • Shake the pan slightly so all the squash gets marinated
  • Put in the oven to be broiled for about 15 minutes, shaking the pan every few minutes
  • Cut the top off the pepper and remove the seeds
  • Slice the pepper into strips
  • Put the pepper in a baking pan with olive oil, salt, and pepper 
  • Put in the oven to be broiled for about 15 minutes, shaking the pan every few minutes
  • Cut each mushroom in half
  • Put the mushrooms in a baking pan with olive oil, salt, and pepper
  • Put in the oven until the mushrooms brown 
  • Boil some water in a small pot
  • Pour desired amount of pasta into the pot
  • Cook to taste, which for me means slightly softer than al dente
  • Strain the pasta
  • Mix the pasta and all the vegetables in a bowl
  • Serve with or without mozzarella sprinkled on top

The Calories:
The squash had 14 calories, the mushrooms had 44 calories, the pepper had 14 calories, and the pasta had 300 calories. The total dish, which filled about four large bowls, was 362 calories, 400 with cheese. So one bowl was about 100 calories. 

What Went Right:
All the vegetables were delicious, the pasta came  out great, it was really healthy and pretty quick! Only about 30 minutes to prepare because I put all the veggies in at once. 

What Went Wrong:
I put a bit much garlic salt on the squash, so some of the pieces were more salty than I liked, but once all the ingredients were mixed together it wasn't a big deal. I would still use less next time. 

Other Ideas: 
I would have liked to add zucchini as well, perhaps. I feel like that would be a nice addition, and potentially some tomatoes. I'm sure I'll experiment with other veggies as well. 
If I wanted to make it a main dish, I would add some sausage slices to it. 

This is going to be a favorite of mine in college :) It stores pretty well too, and it's nice and filling. 

Saturday, March 9, 2013

Cooking Marathon 1: Sweet Potato Pie, Loaded Banana Bread with Cream Cheese, Twice Baked Cauliflower, Zucchini Pizza, and All Natural Cheese-Its!

Happy Saturday!

Sorry it took forever to get this up...I stayed home from everything on Tuesday because we had a snowstorm, so finally posting what I did instead :) believe it or not I had planned to make two other no bake dishes as well...decided to slow my roll on that one as I already took this long to post about these five and I will be cooking again tonight.

Without further ado, in the order of creation:

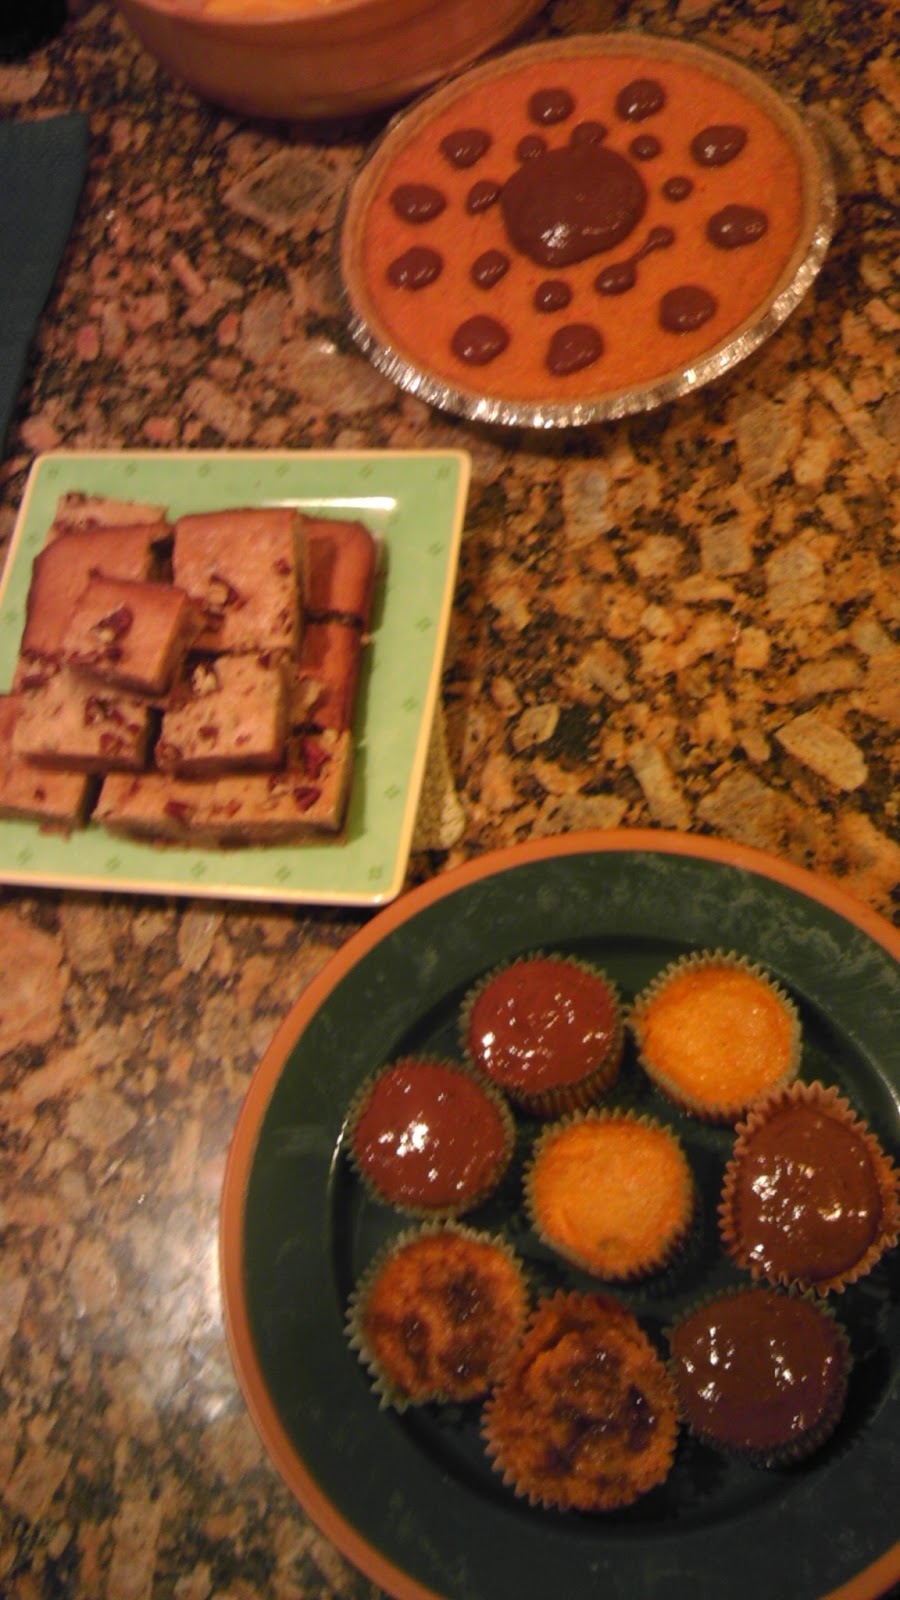
The Recipe: Sweet Potato Pie (with Banana Chocolate Frosting)

  • 1 large sweet potato (about one pound)
  • 1 cup of butter
  • 1 cup of white sugar
  • 1/2 cup of milk
  • 2 eggs
  • 1/2 tsp of nutmeg
  • 1/2 tsp of cinnamon
  • 9 inch all natural graham cracker crust
The Process: 
  • Boil the sweet potato so that it becomes soft (I didn't do this long enough, so I'll be putting my extensive process in parentheses)
  • Remove the skin of the sweet potato and mash (or in my case, remove the skin, slice and dice the potato, and use the magic bullet to mash it as best as possible) 
  • Soften the butter in the microwave
  • Mix the other ingredients in a bowl 
  • Add the mashed sweet potato
  • Mix once again
  • Pour mix into the crust
  • Pre-heat the oven to 350 degrees
  • Bake for about half an hour, testing the center of the pie as needed
  • (Pour the excess batter into cupcake paper and add chocolate chips to taste)
  • (If desired, add brown sugar to the tops of the cupcakes as they finish baking)
  • (Put in the fridge until dinner)
  • (Frost as desired)
The Calories: 
The sweet potato had a total of 390 calories, the butter had 810 calories, the sugar had 720, milk had 130, the eggs had 144, the nutmeg had 6, the cinnamon had 6, and the crust had 880...for the entire pie batter, that means 3086 calories, but divided into about 8 slices, that's 385.75 calories per 1/8 pie. Granted, I also made 9 cupcakes, so it's probably less than that per slice. It's not exceptionally healthy, but at least it's not a cheese pie or a chocolate pie xD
What went right:
                 As previously mentioned, the sweet potatoes were not boiled long enough, but they turned out totally fine...less mashed than they should have been possibly but the pie turned out very nice and even better after being refrigerated. We are only just getting to the end of it....sweet potato pie is very heavy! The chocolate and the brown sugar in the cupcakes went over very well. 

What went wrong: 
               Freaking sweet potatoes. Oh well...live and learn! At least the recipe won't take two hours from start to finish next time. 

The Icing: Banana Chocolate Icing...deceptively healthy :) 
  • Freeze a banana
  • Remove its skin
  • Mix with 2 tbsp of cocoa powder
  • (Add a splash of milk because I was very impatient)
 
The Calories: The banana has about 90 calories, depending on size, the cocoa powder has 24 calories, and the milk had about 130 calories. In total, that's 244, but I only used about a third of the recipe or so. And it's mostly banana. 
The icing turned out well! I cut the bottom tip off a sandwich bag to apply it. 

Moving right along!! 


Because of the sweet potato snafu, I decided to put the cauliflower in early. So I put the baked apples in the oven and my sweet potato pie mess in the dish washer, and then broke the cauliflower off the head. This proved wonderfully difficult! I resolved on using a knife to cut a chunk out and breaking it from there...quite a mess but it worked and hopefully I'll do it better next time :) 

While waiting on the dishwasher I did everything I could to prep the cauliflower dish...cut my peppers and measured the other ingredients out. I still had quite a bit of time, so I started on the Cheese Its...the recipe seemed simple enough...

The Recipe: All Natural Cheese Its 
  • 1 cup shredded cheddar cheese
  • 1/2 stick of unsalted butter, softened
  • 1 cup of flour
The Process: 
  • Pre-Heat the oven to 350
  • Using a blender, mix the ingredients until they become relatively solid. There will be chunks but it should all easily come together as one batter 
  • Every 30 seconds or so, stop the blender and de-clog it so it will continue to blend
  • Once the batter seems relatively together, remove all of it and make one large ball
  • Take the batter ball and put it on a piece of wax paper about a yard long
  • Place another yard of wax paper on top of the ball
  • Using a rolling pin, roll the ball into a pan shape as best as possible. It should be quite thin. (Realize that the dish washer has finally finished!)
  • Cut the batter into squares using a small sharp knife (decide halfway through that this can wait, and made the banana and cauliflower dishes first)
  • Coat a baking pan with wax paper 
  • Use a spatula to take each square off the wax and place it about 1/4 an inch away from all other squares on the pan
  • Take the edges of the batter that are not shaped properly and repeat the balling and cutting process until the batter is done 
  • Bake for about 10 minutes (to desired brownness) and then remove and flip each cracker using the spatula...they will be hot!!
  • Bake on the other side to desired brownness
  • Remove and cool for about 5 minutes
  • Enjoy!
The Calories:
The cheese has 455 calories, the flour has 450, and the butter has 404 calories. The whole batch of crackers is 1309 calories, which makes about 30-40 crackers in one inch squares. Estimating it makes 40 crackers, each cracker is about 4.4 calories. This is only a calorie or so less than normal Cheez Its, but then again, it's only made with three ingredients, and using low fat cheese and wheat flour would make it even more healthy.

What Went Right: 
             They were absolutely delicious and reallyyy addicting. They have a sort of pita-esque taste and I can see them being great with dip. My family loved them and requested another batch...so that happened today. 

What Went Wrong:
            The process took a while, so I decided to soften part of the cheese and fully melt the butter when I made the second batch today...helped soooo much! 

Would I make them in college? Yeah probably. I'll have to try them on the magic bullet before I decide that. I could probably hand mix too and I'll have to try that as well. 

In between this recipe came my Loaded Banana Bread again...but this time I doubled the batch I did last time -as requested- and put it in a more shallow, but larger, baking pan. The banana bread was half as thick, which I didn't quite like as much for it, but it was still very very good.
 
 
Finally, my cauliflower was ready!

The Recipe: Twice Baked Cauliflower
  • Mini red, yellow, and orange peppers
  • One head of cauliflower
  • 4 ounces of low fat cream cheese
  • 4 ounces of low fat sour cream
  • Half a cup of mozzarella and cheddar shredded cheese
The Process: 
  • Boil and mash the cauliflower
  • Slice and dice the peppers
  • Mix all ingredients together and put into a casserole dish
  • Bake at 350 for about 10 minutes
  • Sprinkle cheese on top and bake until the cheese starts to bubble slightly
The Calories: 
The cauliflower had 210 calories, the cream cheese had 262 calories, the sour cream had 154 calories, the cheese had about 160 calories. The total recipe had 786 calories. Very, very healthy :)
 What Went Right: The cheese was great, having the peppers was great, the dish tasted good enough...
What Went Wrong: 
          Possibly mashed the cauliflower too much, because it was very very mashed, leaving the dish lacking in texture, except for the peppers. We decided the dish needed green onion and bacon, and possibly some cheese baked inside...so that might happen later on!
                                                                        

Would I make this in college? eh....maybe. It's not exceptionally difficult and I do like it even without the proposed additions.


My final recipe of the day had to be made while eaten...so I made the sauce and prepared the zucchini slices before dinner. 

The Recipe:  Zucchini Pizza 
  • Three zucchinis
  • Pizza sauce
  • Butter and garlic salt melted together
  • One package of mozzarella
The Process: 
  • Heat the panini pan on the stove
  • Heat the pizza sauce (tomato sauce with basil, garlic salt, lemon pepper, salt, pepper, italian spices)
  • Melt about one tbsp of butter and a few sprinkles of garlic salt in the microwave
  • Cut the ends off the zucchini and slice it into long strips
  • Brush the garlic butter onto both sides of the zucchini strips 
  • Put as many strips as fit onto the panini pan and cook until they sizzle
  • Use a spoon to put pizza sauce on the zucchini strips
  • Sprinkle mozzarella on the zucchini strips
  • Serve warm!
The Calories:
The zucchinis had about 20 calories each, and were cut into 6 strips, the sauce has 20 calories total, and I used maybe half a teaspoon per strip, and a teaspoon of mozzarella per strip, which has about 12 calories. Each Zucchini pizza slice came to less than 20 calories. The most healthy thing I've ever made. 

What Went Right: 
            Sauce was yummy and the thicker slices were really good. 

What Went Wrong:
            I cut the slices too thin for the most part, I should only do four per zucchini. The zucchinis should really be grilled to get the most out of them. Panini pan is the next best thing. But grilled is ideal. 

I plan on making this in college for sure! I enjoyed them quite a bit :) 

Overall it was a fantastic day of cooking and eating, and hopefully my next tries with these recipes will be even better! I learned a lot on Tuesday :)