Translate

Friday, May 31, 2013

Baked Ziti with Sausage and Vegetables

Welcome to one of my family meal challenge dishes!

If you've read my blog description, you may have noticed each month I have more and more posts, rather than just a few per week. I've actually started cooking a few times a week for myself, baking at least once a week, and cooking a meal for my four-person household once a week.

The Recipe: Baked Ziti with Sausage and Vegetables
  • 1/2 box of Ziti pasta
  • 1/2 can of pizza sauce (or any desired pasta Sauce)
  • Mozzarella, Alfredo, Parmesean, and Romano Cheese (again, use desired cheese)
  • Four small frozen sausage links
  • 1 1/2 cup halved mushrooms
  • 1 zuchini

The Process:
  • Boil about 1.5 cups of water in a covered pan
  • Cook pasta to desired stiffness
  • Broil sausage links in the oven on High. After about five minutes, turn the links and broil for another few minutes. They should be fully browned and bubbling, but not burnt.
  • Slice zucchini and cut slices in half
  • cut small mushrooms in half
  • In an oven-safe container, cover the bottom layer with pasta
  • Cover the pasta with sauce
  • Cover the sauce with sausage and vegetables
  • Cover the sausage and vegetables with sauce
  • Cover the sauce with pasta
  • Cover the pasta with sauce
  • Cover the sauce with cheese
  • Bake for 15 minutes at 375 degrees

The Calories:

Pasta: 400 calories
Sauce: 70 calories
Sausage: 267 calories
Mushrooms: 30 calories
Zucchini: 20 calories
Cheese: 180 calories
_____________________
TOTAL: 967

However, this was shared by three members of the family (the fourth deciding to only eat pasta and sausage links, plain), so each person ate approximately 323 calories :)

What went right:
          The pasta was good, although not quite baked. The sausage links were also cooked correctly. Everything tasted right together, and it was a very healthy dish.

What went wrong:
          Like I said, the pasta was not quite baked long enough to be considered baked, so I know I need to bake it longer. Also, the raw vegetables lacked the carmelization to really release their flavor.

What I would do next time:
         First of all, I would bake the dish for half an hour to really get all the flavors to cook together. Additionally, I would broil the zucchini and either broil or sautee the mushrooms as well, to get them to caramelize. I would also heat the sauce before adding it, and put more sauce throughout the dish to make sure it covers everything. To make it a special dish for each season, I could change or add vegetables, such as switching the type of squash. I might also try using different meats, although using frozen sausage links will be the easiest to accomplish in college than anything else.

Would I do this in college:
          Yeah I think I'd do this in college...it would be easy to scale down and even if I didn't, I don't see a reason the dish wouldn't keep and reheat well.

Overall, a tasty challenge dish that I will be doing again to get it just right...stay tuned!


Wednesday, May 22, 2013

Clean Eating Soft Pretzels

Hello Clean Eater!

Anyone else have a pretzel addiction? Yes? Great. Hi, I'm Sydney and I am a pretzel addict! Soft pretzels, pretzel sticks, pretzel thins, pretzel rolls, pretzel bread...say the word 'pretzel' and my brain automatically gets a burst of dopamine just thinking about the best pretzels I've ever eaten.

However, any soft pretzel is typically very rich and caloric, with lots of sodium. That's why this recipe made me very excited!


The Recipe:  Clean Eating Soft Pretzels
  • 4.5 cups of flour
  • 1 packet of rapid rise yeast
  • 3 tablespoons of honey
  • 1.5 cups of warm water
  • 1/2 teaspoon of salt
  • 2 tablespoons canola oil
  • 1 egg
The Process:
  • Preheat the oven to 350 degrees
  • Mix your honey into the warm water and stir
  • Pour the yeast in as well and allow to sit and foam
  • In a separate bowl, mix flour, salt, and oil (and egg if you, like me, don't assume ingredient lists will include what goes on top of the actual food)
  • Slowly mix in water/yeast/honey solution using a wooden spoon
  • The dough will get very sticky, and you will no longer be able to stir
  • Flour your hands and a clean, hard surface (preferably a granite table or any type of easy to clean, stable cutting board)

  • Knead the dough until it becomes smooth and workable. This may take a while! When the dough begins to stick to your hands, pick it up off the table and become one with the dough; it's much easier than trying to roll it around on the table.
  • Roll the dough out into long, thin tubes. They should be about 1.5 inches thick. 
  • Rip about one foot of dough off. Shape it into a U. Fold over each side to the center, making it into a pretzel shape. If you want pretzel bites, rip off small pieces and shape them into balls. 

  • Butter a baking pan and give the pretzels about an hour to rise before baking. 
  • Brush the tops of each pretzel with egg (which I did not do). 
  • Bake at 375 degrees until the pretzels brown slightly. This will take a different amount of time for the bites as the pretzels. Mine took about 20 minutes for the bites and 30 for the pretzels, but every oven is different. 
  • Allow the pretzels to cool before eating. 
  • Add desired topping (I added cinnamon sugar butter to half of them). 
  • When eating on a later date, pretzels should be put in the microwave for 30 seconds on half heat, bites for 15 seconds on half heat. 


Calories:
Because this recipe was taken directly (except for the placement of the egg in vs outside the batter) from another source, I know the pretzels have about 110 calories and the bites have about 30 calories. Typical soft pretzels contain about 400 calories. 

What went right: 
           The pretzels are delicious. They're firm on the outside and chewy on the inside like real German pretzels. They taste great with or without the cinnamon sugar. 

What went wrong:
            Clearly I put the egg in the batter when I should have brushed it on. I also didn't knead quite long enough, because the batter got better as I continued shaping the pretzels. 

What I would do next time: 
             I would like to try brushing the egg on instead of putting it in the batter because I do think it would make a difference. I would also like to try adding raisins or almonds. 

Will I do this in college:  
             May be after I get more used to kneading...it is a great arm workout...but it can get pretty messy and requires a lot of clean space to roll out the dough. Health wise, I will do it for sure!

Overall, it's a great recipe that I hope to adapt to breads and biscuits as I get better at it as well! 

Monday, May 20, 2013

Kale-Sour Apple Smoothie

Happy Green Eating!

If you're brave enough to eat kale, you're probably a very devoted health foodie :) If not, I hope you try it anyway and end up enjoying it!

The Recipe:  Kale and Apple Smoothie

  • 1 leaf  Kale, shredded
  • 1 Apple, chopped
  • Water 
The Process:
  • Shred your Kale leaves
  • Peel and chop your apple, tossing the core
  • Put both into a Magic Bullet cup
  • Add a small amount of water (you will need to add more as you blend, depending on how thick you want it)
  • Blend with the Magic Bullet until it is at desired thickness. 
  • Bottoms up!
The Calories:
Apple: 77 calories
Kale: 17 calories
_______________
TOTAL: 94 calories
This is less than most protein shakes or bars, so you can have it as a small snack for that little extra cleansing boost. 

What went right:
          The smoothie tastes like sour apple, which is a flavor I quite enjoy! 

What went wrong:
          I think I was a little impatient once I smelled it, but the consistency was still a bit leafy. I will have to blend more next time or add more water. If that doesn't work, I will try steaming the Kale first. 

 What would I do next time:
          Add more water and possibly steam the Kale first. I don't think this smoothie needs anything otherwise...the flavor is very strong and to add anything else would only muddle it. 

Will I do this in college:
          Depends how the next batch turns out, but probably!

Overall it's a yummy smoothie if I can get it smooth enough...I might need to add milk or yogurt, but that would also make it less healthy and more heavy so I doubt I'd do it. Check back to see if the second batch turns out!


Saturday, May 18, 2013

Egg Custard and Egg Custard Mini Tarts

Hey Dessert Lovers! 

Yes, I know this isn't particularly healthy. Which is why while it was cooling I went for a bike ride :) 

The Recipe: Egg Custard
  • 1 egg
  • 1 egg yolk
  • 1 cup whole milk
  • 1/6 cup sugar
  • 1 tsp vanilla extract
The Process: 
  • Preheat oven to 350 degrees 
  • Heat the milk on the stove until it simmers
  • In a separate bowl, mix the egg, yolk, sugar, and vanilla
  • Pour the mixture into the milk, whisking gently
  • Pour the new mixture through a strainer into a measuring cup
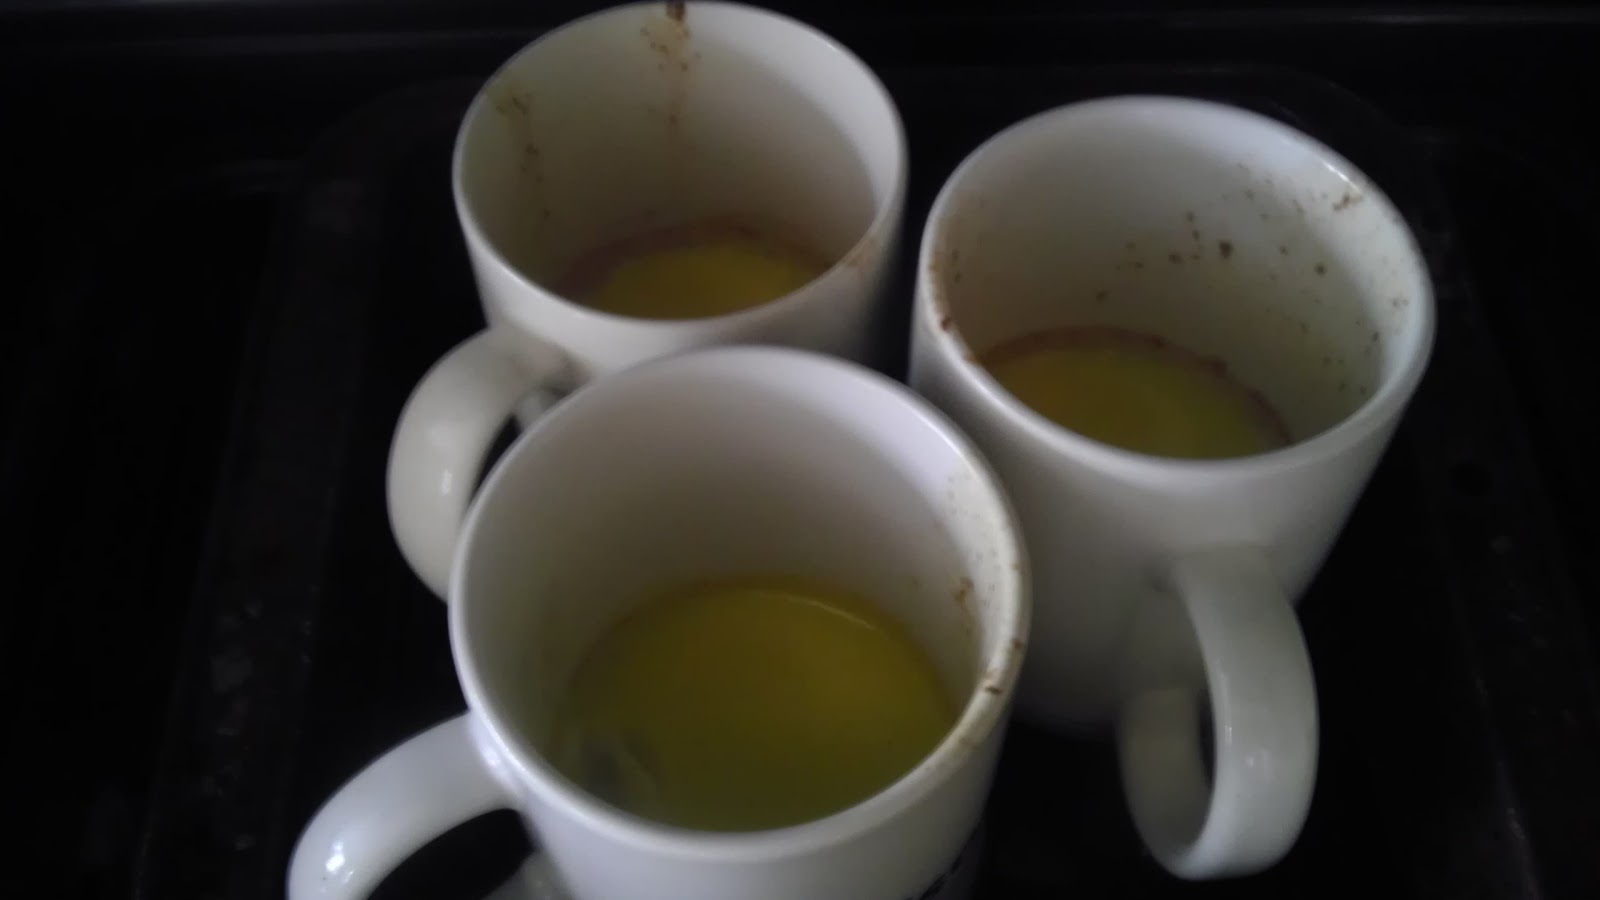
  • Place three coffee cups on a baking pan
  • Fill the pan with a small layer of warm water
  • Pour part of the strained mixture into each cup
  • Bake for 30-45 minutes, or until the custard has settled. You may have to test it, but the edges should be browned, and the custard should have a yellow skin. 
  • Allow to cool for 2 hours before serving. (I also put it in the fridge for another few hours.)
  • Enjoy!
Now, let's go through the Egg Custard Mini Tarts...
  • Press 1/6 of a crescent roll into each section of a mini cupcake pan
  • Pour a small amount of custard into each mini tart
  • Bake for 15-20 minutes
  • Allow to cool before serving (I also put these in the fridge)
  • Feel better about eating custard! 
The Calories:

Egg: 70 calories
Yolk: 55 calories
Milk: 146 calories
Sugar: 120 calories
Vanilla: 12 calories
_________________
TOTAL: 393 calories

One crescent is 90 calories, so each tart contained 15 calories of crescent. In total the crescents used about 1/6 of the custard, which is 66 calories. This makes each tart 26 calories! 

The rest of the custard was divided into each of the three coffee cups. This means each cup was 109 calories! 

What went right: 
          I made everything correctly...the tarts were pretty good, but...

What went wrong: 
          The Custard was a little egg-y...for obvious reasons...but it wasn't my, or my brother's thing. 

What would I do next time: 
          Make normal custard instead of egg custard. 

Will I do this in college: 
          Only if I meet people who love egg custard and I want to give them a birthday treat. 

Overall, I can't wait to make non-egg custard and see how that turns out! 


Friday, May 17, 2013

Single Serving Hash Browns

Hello and welcome! 

Today's meal was made with a little extra love...
My little brother is home sick and finally getting his appetite back. He said he was ready for a hearty meal, but he doesn't eat eggs or sausage (without pasta), and I don't feel like pancakes or waffles really qualifies as "hearty" or healthy for a sick person. When I first offered hash browns, he thought it was too much trouble, since usually they're made on a large griddle for our entire family. My crouton experience taught me that this was not the case!

The Recipe:  Single Serving Hash Browns
  • 1 potato, skinned, sliced and diced
  • 1/4 tbsp butter
  • salt and pepper
The Process:

  • Heat a frying pan on high
  • Change to medium heat and melt the butter into the frying pan
  • Put potato chunks in the pan
  • Sprinkle with salt and pepper
  • Cover the pan
  • Cook for 3-5 minutes before moving chunks around to "flip" them
  • Repeat until all have browned
  • Switch to low heat for 1-2 minutes
  • Serve to my lovely sick brother


The Calories: 

Potato: 150 calories
Butter:  25 calories
Salt and pepper: 1 calorie
_______________________
TOTAL: 176 calories

What went right:
          They came out wonderfully. My brother enjoyed them :) 

What went wrong: 
          We only had one potato, so I don't get any :( 

What I would do next time:
          Get a second potato ;) I might also try sweet potato, red potato, or new potato hash browns. Also, I know I will have a smaller pan in college than I have at home, so I might instead form a potato pancake. 

Will I do this in college?:
          Yes for sure. This is a super easy way to make a hearty, healthy, filling breakfast. I would enjoy it with  more fruit of course. 

           
The final breakfast consisted of orange juice, grapes, hash browns, and a Grands Biscuit. The package officially comes with 12 biscuits, which most people would feel the need to make all at once. I made only one for him, wrapped the others in wax paper to re-create the tube, and put them in an airtight sandwich bag in the fridge. This little trick is also great for college...one pack of biscuits can last many different meals, and each could be  flavored differently! (Hint hint wink wink nudge nudge, look out for a future post called Experiments with Biscuit Dough)

Full and happy, my little brother has returned to bed. I hope when he wakes up he feels better<3


Thursday, May 16, 2013

Spring Easy Salad

Happy Spring!

Yet another late night fridge raid that led to a wonderful meal :) 

The Recipe: Spring Easy Salad
  • 1 apple, peeled, sliced, and diced
  • 3 inches of cucumber, sliced and cut in half
  • 1 tomato, sliced and diced
  • 5 leaves of Romaine lettuce, chopped
The Process:
  • Chop lettuce
  • Peel, slice, and dice apple
  • Slice and dice tomato
  • Slice cucumber
  • Toss salad
  • Enjoy!
The Calories;

Lettuce: 24 calories
Cucumber: 15 calories
Tomato: 33 calories
Apple: 77 calories
____________________

TOTAL: 149 calories

Of course, if you want to add any sort of dressing or oils that adds a lot of unnecessary fat and sodium. 

What went right:
          It's a great salad, light but filling. The great part about this salad is that it is light enough to have a large portion if you feel so inclined, but this size is definitely enough to satiate hunger. 

What went wrong:
          The tomatoes started to get a little warm since it took a while to eat the salad. Other than that, nothing. 

What I would do next time:
         I think it would be good to try it without the tomatoes, and instead add halved grapes and toasted nuts...possibly pecans, or honey roasted walnuts. 

Would I do this in college:
          Salads are definitely going to be a large part of my diet in college. 


Garlic Sesame Croutons

Hey Food Fans!

I know it seems strange that I'm making croutons, but I promise they were part of a fantastic salad! Plus, I got to use an old roll that we otherwise would have had to throw away.


The Recipe: Garlic Sesame Croutons

  • 1 sesame roll, cut into small cubes
  • 1/2 stick of butter
  • Pepper
  • Garlic Salt
The Process: 
  • Melt the butter onto a pan
  • Put the pepper and garlic salt into the melted butter
  • Cook the roll cubes in the pan, moving them around so they take in more of the solution
  • Cook until the solution has dissipated and the croutons have browned. 
  • Cool on a rack for about 10 minutes. 
  • Enjoy!

The Calories:

Sesame Roll: 220 calories
Butter: 405 calories
Salt and pepper: 10 calories
_________________________
TOTAL: 635 calories

Divided by 30, this means each crouton is about 21 calories. 

What went right: 
          They are very delicious and addictive. My family enjoyed eating them on their own before the salad was finished. I must say, they make a great snack. 

What went wrong:
          Nothing! So tasty, all natural croutons. 

What I would do next time: 
          It would be fun to try in a tomato soup or to make garlic bread. I would also like to try some different flavors, like making bacon in the same pan and then sprinkling them with cheese. 

Will I make this in college:
         Yes for sure. They're so delicious, only take a few minutes to make, and probably cheaper than buying croutons. They're also a great way to use stale bread. 

Overall, a delicious, useful little thing to know! 

Lean Salad Sandwich


 Hey food fans!

This is somewhat of a late night leftover sandwich, as we had chicken a few nights prior, only a few slices of ham left, and part of a loaf of french bread. Simple, no cooking needed, and delicious :)

The Recipe: Lean Salad Sandwich

  • 2 oz low sodium Ham
  • 1/4 grilled chicken breast
  • 3 slices of tomato
  • 5 slices of cucumber
  • 4 leaves of Romaine lettuce, chopped
  • 6 inches of french bread
The Process:
  • Slice your french bread in half
  • Lay down the ham across both sides
  • Slice the chicken and lay it across one side
  • Lay cucumber across the non-chicken side
  • Slice the tomato and lay it across the chicken side
  • Wash and chop the lettuce and toss it on the cucumber side
  • Close your sandwich, and enjoy!
The Calories:

French Bread: 200 calories
Ham: 60 calories
Chicken: 100 calories
Tomato: 11 calories
Cucumber: 6 calories
Lettuce: 8 calories
________________________
TOTAL: 385 calories

That's awesome for a very filling sandwich, with rich bread and fresh, all natural ingredients. This recipe works well because it has a strong balance of crunch, meat, vegetable, juicy, and dry ingredients. It is most notably healthy because it does not have mayo, mustard, dressing, or any other kind of high-sodium, low nutrient value condiments. It is these additions and other chemical additives that make what could be a healthy sandwich into a problem. 

What went right:
          Everything...it's kinda hard to screw up...

What went wrong: 
          Nothing :)

What would I do next time: 
          To make this more salad-like, I might try hollowing out the bread; making croutons from the insides; loading it with lettuce first and then chopped tomato, cucumber, and chicken; using ham cubes or bacon pieces; and finally adding the croutons on "top", closing the sandwich, and eating it that way. It would become somewhat of an inverted sandwich, with all the meat at the center, surrounded by lettuce. This might also make the sandwich easier to close and eat. 

Will I do this in college:
        I think a late night leftover sandwich sounds like a very collegiate thing to do, don't you agree?

You may be asking,  'Who really needs a recipe to make a sandwich?' I don't, necessarily, when I'm tired and have nothing else that needs my immediate attention. But in college, at 2am, when I have papers to write and about zero brain cells left to focus on what I want to eat? I'd rather be able to scroll through my blog, see a nice and easy healthy sandwich, and make that than turn to whatever other snacking I can get my hands on in the same amount of time. 


Tuesday, May 14, 2013

Banana Apple Bacon Grilled Cheese on Cinnamon Raisin Bread

If you've chosen this post, you're more than likely intrigued as to how such a strange combination tasted so addicting, I made and ate TWO that night. And even though I've already had dinner, writing about it makes me want another one right now. It's that good.

The Recipe: Banana Apple Bacon Grilled Cheese on Cinnamon Raisin Bread
  • 2 slices of Cinnamon  Raisin Bread
  • 1/2 banana, sliced long ways, thinly and then each slice should be cut in half
  • 1/2 apple, sliced thinly, no core
  • 1 strip of bacon, cooked, broken into pieces
  • 1 tbsp shredded, low fat Mozzarella
  • 1/4 tsp butter
The Process: 
  • Heat your panini pan and press on a large burner using high heat
  • Set the press aside on the stovetop
  • Spread butter on both sides of both slices of the bread
  • When the pan is hot enough, place both slices of bread on the pan...remember to turn the heat down!!
  • Sprinkle mozzarella on both sides of the bread
  • When mozzarella is securely melted on each slice, lay the banana slices on one slice of bread
  • Next, lay the apple slices on top of the banana slices
  • Finally,  lay the bacon pieces on top of the apple slices
  • Close your sandwich, and press until grill marks brown to desired color
  • Enjoy with cinnamon sugar pita chips or other all natural snack

The Calories:

Bread: 170 calories
Banana: 45 calories
Apple: 40 calories
Bacon: 42 calories
Mozzarella: 20 calories
Butter: 25 calories
_____________________
TOTAL: 342 calories

As a sandwich goes, this is a pretty healthy option! Your typical panini has more than that in the bread alone. If you're looking at that and thinking, "Wait...but you ate two!", think for another second about what I really ate: a banana, an apple, two strips of bacon, and a relatively small amount of cheese and butter, on homemade cinnamon bread. And still ate only 684 calories for a main course for dinner.

What went right: 
           It's a strange but perfect combination! Healthy, natural, well-rounded...I love this sandwich.

What went wrong:
           The first time I almost burnt the bread because I didn't turn the heat down. Came out great though once I noticed.

Will I do this in college:
           Definitely. I might not eat two at once but I will for sure be making it.

Overall, I think this is a wonderful sandwich not only for dinner but for lunch, or even for appetizers if they were cut in diagonal fourths. It's quick, easy, and healthy...Just what every college student needs!

Deceptively Healthy Dessert: Fat Free Chewy Chocolate Cookies

Welcome Deceptively Healthy Baking Fans! 

I was skeptical of this cookie recipe when I came across it on Pinterest. 'Fat free' and 'chocolate cookie' just didn't seem to fit in the same paragraph, much less recipe title. As the cookies came together, it made more sense...
The Recipe: Fat Free Chewy Chocolate Cookies
  • 1.5 Cups Flour
  • 1/2 Cup Sugar
  • 1/2 Cup unsweetened cocoa
  • 1/2 tsp Baking Soda
  • 1/4 tsp salt
  • 1/2 cup Karo syrup
  • 3 egg whites 

The Process:
  • Preheat the oven to 350 degrees
  • Butter a cookie sheet or spray with cooking spray
  • In a large bowl, mix/sift the cocoa, baking soda, flour, sugar, and salt. Try to get out all the lumps.
  • Crack your eggs into a smaller bowl, separating the whites from the yolks by carefully transferring the yolk back and forth between the egg shell halves. (You can save the yolks separately for later use in any other small container. If you do not save them separately, remember to label the container '3 egg yolks', so you know later on)
  • Add the egg whites and Karo (corn syrup) to the dry ingredients
  • Mix until the dough becomes thick, sticky, and thoroughly blended
  • Use a spoon to drop small cookie balls onto the cookie sheet (the recipe says it makes 30, but I made almost 60...size matters!)
  • Bake for 7-9 minutes, watching to see that the cookies rise
  • They will still be soft to the touch, but a toothpick test will come out dry
  • Allow cookies to cool and set for a couple minutes
  • When storing, be sure to use wax paper to separate the cookies, and do not lock them into the container. Otherwise, they will stick together. 
  • Enjoy!
The Calories:
Again, I've taken this recipe from another source. The only thing I changed was the salt content, which I cut in half. Additionally, mine were smaller. The recipe online says 55 calories per cookie. This makes mine about 27 calories per chewy chocolate cookie, and zero fat! 

What went right: 
         They are fantastic!!! Everyone who's had one loved it. They almost taste like brownies, and the small size, zero fat, and low calorie content makes them guilt-free as well :) 

What went wrong: 

         The first time I packaged them, I learned that they stick together. This was quickly remedied, and did nothing to the amazing taste of the cookies.

What I would do next time:
          A few new recipes for the batter come to mind...
  1. Fat Free Blondie Cookies (no cocoa powder and light Karo syrup)
  2. Fat Free Chewy Chocolate cookies with walnuts (add walnuts...could be done with pecans or almonds as well)
  3. Fat Free Chewy Chocolate cookies with white chocolate chips (add white chocolate chips)
  4. Fat Free Chewy Chocolate cupcakes with banana chocolate frosting (made with a frozen banana and unsweetened cocoa powder)
  5. Chewy Chocolate Boston Creme cupcakes (bake cupcakes, cut the top open, fill with custard, close, and top with all natural, home made whipped cream)
  6. Fat Free Chewy Chocolate cake batter (filling can vary from raspberries to chocolate truffle/mousse and caramel...possibilities are endless)
Will I do this in college:
          To all my lovely future classmates who so kindly read my blog, I promise you I will be making these cookies a LOT! They are quick and easy and -for the 15th time- fat free!

This recipe is definitely going to come back in other forms, so stay tuned for the fat free results! 


Wednesday, May 8, 2013

Loaded Oatmeal

Hello hello!

Thanks for being such an avid reader :)

While on my oatmeal kick, I decided to see what was so wrong about normal, instant oatmeal...

The Recipe:  Loaded Oatmeal
  • 1/2 cup Rolled Oats
  • 1 cup warm water
  • 5 strawberries, cut in 1/4 slices
  • 1 banana, sliced
  • 1 apple, sliced and diced
  • 1 tsp brown sugar
  • 1 tsp honey
  • 1/4 cup wheat germ

The Process: 
  • Preheat the oven for 325 degrees
  • Mix the water and oats
  • Microwave until oats are saturated
  • In an oven-safe bowl, mix the apple chunks, honey, and wheat germ into the oatmeal
  • Lay the bananas and strawberries on top of the oatmeal
  • Sprinkle the top with brown sugar, so that it will create a caramelized layer over the oatmeal
  • Bake the oatmeal for about 10 minutes, or until the brown sugar has all caramelized
  • Remove and transfer to a normal eating bowl 
  • Enjoy?
The Calories:

Rolled Oats: 150 calories
Strawberries: 15 calories
Banana:         105 calories
Apple:            77 calories
Brown Sugar: 17 calories
Honey:           21 calories
Wheat Germ: 104 calories
__________________________
TOTAL:        489 calories

Not terrible, considering this is high fiber and has three different fruits.


What went right: 
            The heated fruits were awesome!

What went wrong:
            I am not a fan of oatmeal.......the mushiness was definitely combated well through the fruit additions and they really don't taste like anything, so that's fine...

Would I do this in college:
           Can't say that I would! However, I could try a sort of baked fruit salad...hmmm...foreshadowing??

Overall, I did everything right and learned a valuable lesson about why oats are great in cookies and bread, but oatmeal...not so tasty! Oh well, I still ate it all :) 

Tuesday, May 7, 2013

Cauliflower Crust Zucchini Pizza

Low carb, high veggie and lipid diet anyone?

Well, even if you're not, on the same night, we made a pizza without zucchini using a pre-made dough. Totally cheating, but certain members of my family were not up for trying the cauliflower crust pizza.


The Recipe: Cauliflower Crust Zucchini Pizza
  • 1 head of Cauliflower
  • 1 egg
  • 1 cup shredded, Low Fat Mozzarella
  • 1 Zucchini, sliced
  • 3 tbsp shredded, Low Fat Mozzarella
  • 2 tbsp shredded Parmesan
  • 1 tbsp shredded Four Cheese Mix
  • 1/4 tbsp dried basil
  • 1/2 can Pizza Sauce

The Process: 
  • Preheat the oven to 425 degrees
  • Line a rimmed baking sheet with wax paper (Which ended up being a completely stupid idea...you'll see.)
  • Boil the cauliflower on low heat for 30-45 minutes (Depends on your stove...I think I gave them too much water)
  • Strain and mash the cauliflower
  • Mix in the egg and 1 cup of Mozzarella
  • Line a strainer with ample amounts of paper towels
  • Allow mix to strain briefly, pressing lightly
  • Wrap the mix in paper towels and slowly wring to remove excess water
  • Refrigerate the mix for about 10 minutes (While cooking the other pizza)
  • Pour the mix onto the baking pan and shape 
  • Bake for 10-12 minutes to prepare the crust
  • Spread on pizza sauce
  • Sprinkle with dried basil
  • Sprinkle with cheeses
  • Arrange zucchini
  • Bake until the crust becomes yellow/brown at the edges and the cheese and sauce begins to bubble (I ended up taking this one out slightly early because of problems I will explain in a moment)
  • Allow to cool
  • Slice into desired portions (Or make into pizza burrito...)
  • Enjoy!

The Calories:

Cauliflower: 144 calories
Egg:             75 calories
Mozzarella:  431 calories
Parmesan:    42 calories
Four Cheese:22 calories
Pizza Sauce: 40 calories
Basil:            1 calorie
Zucchini:       52 calories
___________________
TOTAL: 730 calories

This is slightly higher than 1/2 of an entire Connie's All Natural Frozen Cheese Pizza. To put things in perspective, wow. That's a healthy pizza. Despite all the cheese. 

Now let's talk about what happened here...

What went right: 
         Both pizzas were going great. They looked great, tasted great, and smelled great. The cauliflower I got to eat all of in the form of a burrito because I purposefully under-cooked it to combat the fact that...


What went wrong: 
         The normal pizza finished first, a shining thing of absolute beauty. And stuck to the wax paper, so was inedible in the regular fashion...we ended up attempting to pull some of the paper off and partially getting to eat some normally...the rest we had to toss or eat sort of face to cheese...don't ask! 

        For that reason, I under-cooked the cauliflower pizza in the hopes of getting it off the wax paper. I succeeded by folding the entire pizza over itself using the wax paper, pulling off one side, flipping the uncovered side onto a plate, and then pulling off the other side.

       I really want to try this again without the wax paper, since it all tasted quite nice :)

Will I do this in College?:
        We'll see how it comes out the second time, but I think I could make this happen pretty easily in college...it doesn't take that long once the cauliflower is boiled, and I can eat an entire pizza without feeling like I've eaten an entire pizza!

Overall, I really wish I hadn't used the wax paper...thanks to my dad making salads and my family being creative, we didn't have a totally ruined dinner. Stay tuned for Cauliflower Crust--Try 2!

Baked Pear Chips

Hey Fit Food Fans!

Ever seen a recipe that said "2 hours at 200 degrees"? Well I've seen many, and decided I don't have two hours to wait for the oven to make something!

The Recipe: Baked Pear Chips

  • 1 Pear
The Process:
  • Preheat the oven to 325 degrees
  • Thinly slice a pear and lay slices on baking sheet
  • Bake until brown
  • Oops?
The Calories:

1 Pear:   97

So yea, if it worked this would have been super healthy! The one pear made around 50 chips, and I did eat all of them.

What went right:
           I ended up with baked pear chips...sort of? 

What went wrong:
          Like I said, I ate all of them. But...not gonna lie, they were strange and kinda chewy but kinda mushy but kinda burnt...next time I'm not taking shortcuts!

Would I do this in college?:
           It'd be interesting to do in college...wait for my snack and race the oven to finish a paper or something along those lines. We'll see how the non-cheating batch comes out!

Overall, I've learned a valuable lesson about not cheating or taking shortcuts. Oh food...how you never cease to amaze me.